Self finishing well: practical tips
Why do we need external finishing of the well in the country, what materials are used in its implementation and what budget methods of finishing the wells are relevant today? We will answer these and similar questions within this article.
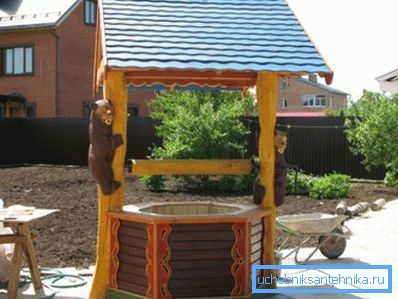
Ways of facing the well
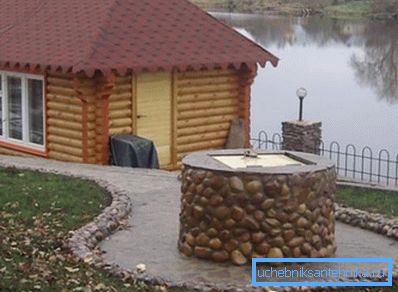
Of course, the finishing of wells is not a mandatory measure. But, if the concrete rings sticking up in the middle of the plot do not please your view, you cannot do without exterior trimming (see also the article Bottom filter for a well: when it is needed and how to make it).
So, we list the available options for finishing wells and methods for their implementation.
Brick finish
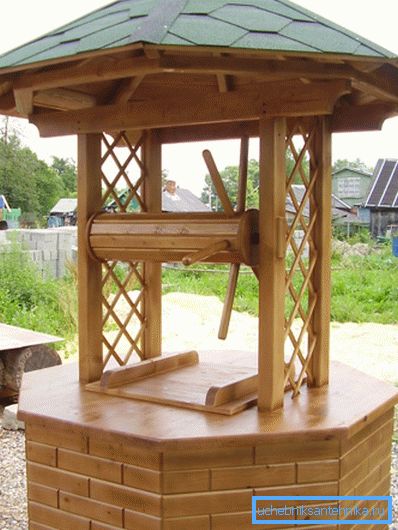
This is a simple method that any summer resident can cope with. To do this work with their own hands, they buy a full-bodied brick, which later will be placed either lying or on the edge.
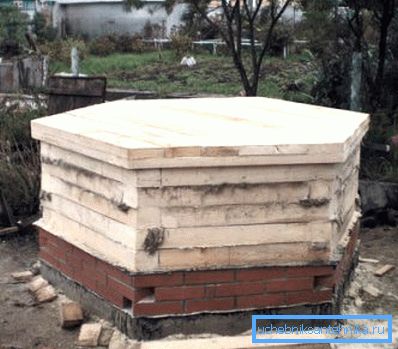
The technology of the work is as follows:
- Approximately 1 meter around the concrete rings choose the soil to a depth of about 30-50 cm.
- The soil in the deepening of the rammer to the formation of a dense crust.
- We make formwork of boards in the form of a rectangle, hexagon or other geometric figure.
- Above the compacted soil we cover the sand cushion with a layer of up to 10 cm and compact the backfill with a rammer.
- On the top of the sand pillow we line the stripes of the chain-link.
- Next, we pour concrete into the formwork, prepared from the following proportions: cement M400 - 3 parts, river artificial sand - 3 parts, fine-grained building rubble -4 parts.
- Concrete poured into the formwork, carefully aligned parallel to the horizon.
- As the concrete dries out, in a small amount we prepare a cement-sand mortar and level it with relief, on a ready-made concrete base.
Important: To prevent the concrete in the formwork from cracking when drying, periodically sprinkle it with water or equip a temporary shelter in order to create a shadow.
- Next, mark around the well 6 equidistant points, so as to ensure that the lines connecting them in the center adjoined to the concrete ring of the well. On the planned points we hammer in the expansion bolt shield and we connect them the twine. This will be the line along which the brick will be laid out.
- Put the brick with some offset from the previous row in order to get the strongest bond.
Important: The brickwork around the concrete ring will be clean, so everything should be done as carefully as possible. Again, the joints between the bricks must be formed before the masonry mortar begins to dry.
Wood trim
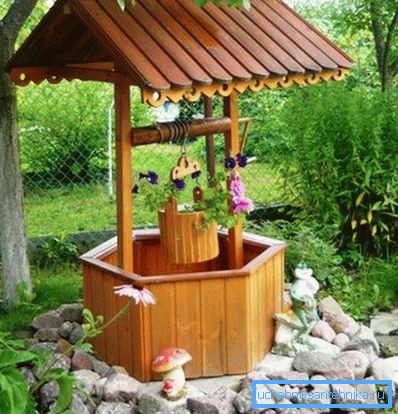
Today, the finishing of the concrete ring of the well with sawn timber is considered the most popular due to its simplicity and high quality of the finished result. Different sawn timber can be used for the external lining of a concrete ring, including rounded logs, profiled timber, edged board and even slab, the price of which is more than affordable.
Regardless of what material you decide to use for lining, the finished result, first of all, will depend on your imagination. Consider the most affordable way to finish with the use of profiled timber.
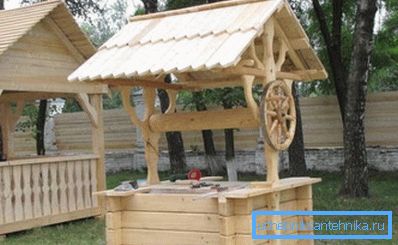
Instructions for finishing work as follows:
- We choose the soil with a layer of vegetation at 1-1.5 meters around the perimeter of the concrete ring.
- We make wooden formwork for pouring concrete.
- In the formwork we lay stripes of the chain-link or make a bundle of reinforcement bar.
- We prepare mortar from cement (3 parts), sand (5 parts) and fine-grained crushed stone (4 parts).
- Fill the formwork and level. The height of the concrete base should be 15-20 cm above the ground surface.
- Prepare the bar for laying the bottom strapping in the shape of a square. Two beams will go entirely, and another beam we split.
- That side of the bars, which will come into contact with the concrete surface, is carefully covered with a layer of bitumen mastic.
- First, parallel to each other, lay out the half bar.
- On top of the halves are placed whole bars, from the corners of which the connecting bowl is selected in half-wood.
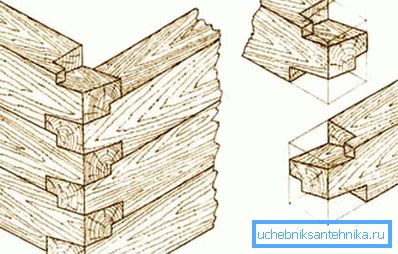
- The corner joints are fastened to the concrete base with wooden dowels. To do this, a through hole is drilled in the timber, turning into concrete.
- Further from the bars we plan dowels, which should be twice as thick as a bar. Punched into the holes prepared by means of a sledgehammer. Excess wood is cut flush with the surface of the timber.
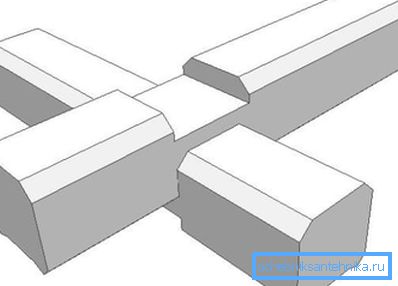
- In the second row of the bars we place the whole with an angular connection in the paw or in the oblo.
- We fasten the timber in the first and second rows with the help of wooden dowels so that the dowels of the second row are slightly offset relative to the dowels in the first row.
- After the timber is brought up to the surface of the concrete ring, we make a plank frame, on which it will be possible to fix the hatch, which prevents the ingress of debris into the water intake shaft.
Wooden house
The design, assembled with the use of edged boards will not only decorate the well, but also protects water from possible contamination. Consider the instructions for the construction of a fully enclosed house, which are still widely used outside the city to this day (see also the article Water supply scheme from a well: several options for all cases).
Important: This finish is the best option for those wells where water intake is carried out by means of a submersible pump.
At the initial stage we will procure construction materials.
We will need:
- edged board 100x25;
- timber 100x80;
- door hinges;
- roofing material and bituminous mastic;
- flat slate;
- screws and nails.
Also, you will need the following tool to work:
- hacksaw for wood;
- electric jigsaw;
- plane;
- water level;
- screwdriver with drill function;
- spade;
- tape measure and pencil.
The construction instructions are as follows:
- Align the soil around the concrete ring and fill it with pebbles on top, with a layer of not more than 5 cm.
- Pebbles pour water and thoroughly ram.
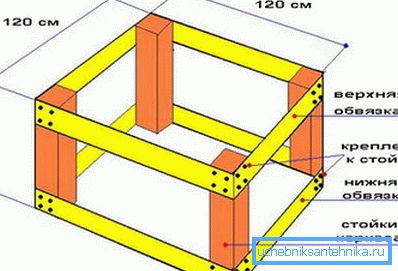
- At the next stage, we collect the frame shown in Figure 1. Tying the frame do as follows. We place on a flat surface of the frame stand and nail the boards of the lower and upper trim.
For greater strength of the whole structure, we fix the boards on each side with 4 screws. Nails for such purposes should not be used, because the frame with time can become shaky.
- Next we also connect the other two racks of the frame.
- After that, we assemble the assembled parts of the frame around the concrete ring and assemble them together.
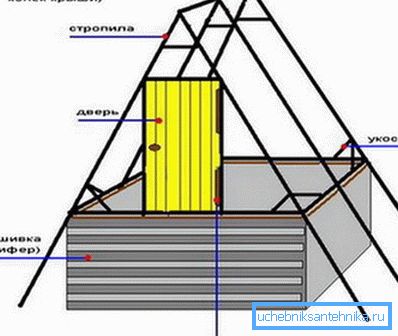
- At the next stage, we assemble the truss system, as shown in Figure 2. To ensure the maximum strength of the structure, connect the rafters and other structural elements should be through special hardware and screws.
- Immediately after the truss system is installed, assemble and install the wooden frame under the door.
- We make the door in the form of a type-setting shield from an edged board and install it on the door or piano hinges.

- We make the trussing of the truss system and strengthen the construction of the rafters, as shown in Figure 3 and 3a.
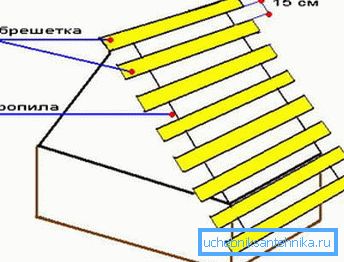
- Next, we revet the roof truss net with roofing material, which we glue onto the bitumen mastic.
- Top lay flat slate, which is fastened with nails.

- At the final stage, we sheathe the entire structure with boards as in Figure 4.
Tip: In order for the well house to last for a long time without changing the initial performance, all sawn timber must be treated with antiseptic agents prior to construction.
Conclusion
Now you know how to trim a well in order to make it look better and more comfortable in everyday use. Of course, there are other ways of facing concrete rings, we also listed the most popular and popular ones (see also the Inlet Manifolds - their types and structure).
More interesting and informative information you can find by watching the video in this article.