Self-made shower: we collect a design from the basis to a
To build a homemade country shower under the power of almost any of us. In principle, an oil curtain stretched between the trees may be enough for water procedures, but if we plan to spend almost the whole summer outside the city, then it is worthwhile to wipe out the capital structure.
In the article below we give a description of the main stages of the construction of a simple, but convenient, reliable and durable shower.

Site preparation
Place to drain water
Before the cost of the booth itself, we need to provide a place for water flow. Well, if a sewage septic tank or a cesspool is located nearby - then it will be possible to lay a pipe and drain all waste there. If there are no such structures, it is worthwhile to equip a simple filter well.
It is done fairly quickly:
- Immediately under the shower or behind it we dig out a pit with a depth of about one meter - one and a half. The area of the pit usually depends on what we will use to strengthen the walls, but most often, drain holes with a diameter of 0.5 to 1.5 m are used for draining.
- We strengthen walls of a hole in order to avoid fall. For this purpose, it is easiest to use concrete rings for wells. If their price seems too high, you can take old tires or assemble a used ceramic brick.
Note! The silicate brick under the influence of moisture quickly collapses, therefore you should not use it.
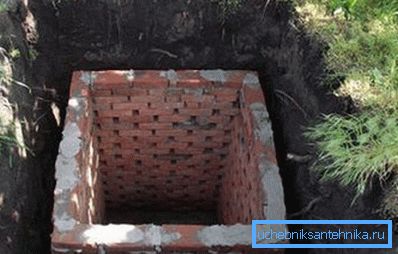
- At the bottom we fall asleep layer of drainage - pebbles, gravel, rubble, boulders, etc. The larger the drainage layer, the slower the bottom will silt.
- From above we arrange overlapping from boards, a concrete coupler, soil and sod. In the ceiling we leave the products for ventilation and a small hole through which the drain pipe will be turned inside.
Arrangement of the pallet
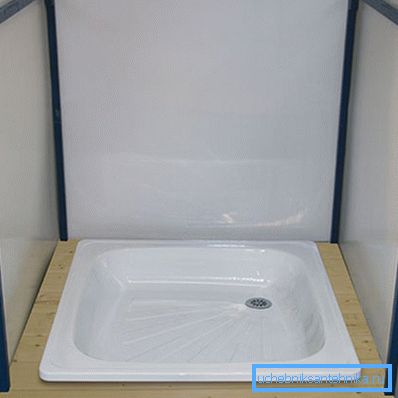
Next, we need to equip the base, which will collect the water falling from the shower and direct it to the drain hole.
For this purpose, steel pallets for shower stalls are often used, but you can also make a homemade shower tray:
- To begin with, we dig a pit up to 30 cm deep. The dimensions of the pit should correspond to the dimensions of our shower room.
- At the bottom of the recess lay the pipe leading into the drain hole. The opening of the pipe is placed near the back wall of the future pallet.
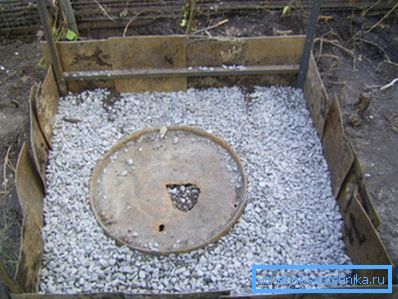
- The pit is filled with sand, which is thoroughly rammed. At the same time, we make sure that the layer of sand near the front wall is slightly thicker - so we get the slope we need.
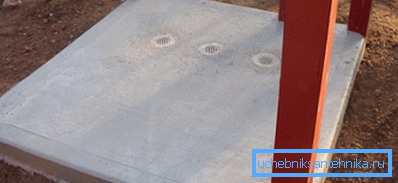
- Fill the structure with a solution, forming a flat surface with a slope to the back wall. Filling is performed in such a way that the upper edge of the drain pipe is at the level of the floor or slightly below it.
Tip! At this stage, the drain hole should be temporarily plugged with a cloth, and after completion of concreting - covered with a decorative grid.
- Along the perimeter we install a blind area of ceramic bricks, which we connect with each other using the same mortar.
- After the mortar has dried, either we veneer all surfaces with floor tiles (then it will be possible to step into the pallet with bare feet), or install wooden flooring from the top of the boards, connected with small gaps to drain the water.
Building a shower
Cubicle walls
If our goal is to build a shower that is as affordable as possible for the dacha, then it is better to make a framework from wood. Of course, metal structures are more durable, but for their assembly often requires a welding machine, so that to perform all the operations with their own hands, you will need very specific skills.
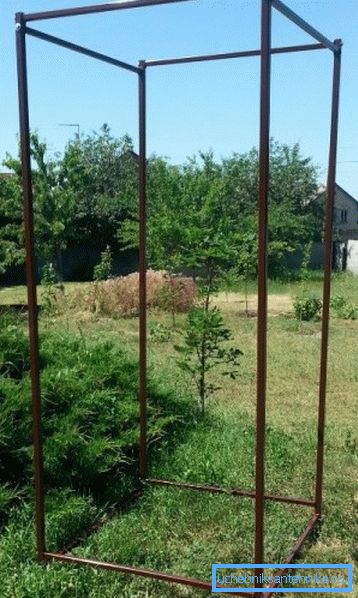
In any case, we begin to make the frame with the arrangement of the foundation:
- At the corners we dig concrete blocks of small size into the ground. Instead of blocks, you can use columns of ceramic bricks, towering above the ground by about 10 cm.
Tip! We lay sheets of roofing material on the supports, which will protect the frame of the shower from moisture.
- From a wooden bar with a section of 40x40 mm or a similar shaped pipe, we assemble a frame. It must necessarily include vertical posts with a length of up to 2.2 m, as well as upper and lower trim around the perimeter.
- If wood is used for work, then we saturate it with an antiseptic in order to avoid rotting. Metal parts must be painted to prevent corrosion.
- Install the parallelepiped on the base and fix it on the foundation using anchors.
- At the front of the structure we install hinges for hanging the doors. The side and rear walls are reinforced by transverse and diagonal stiffening ribs.
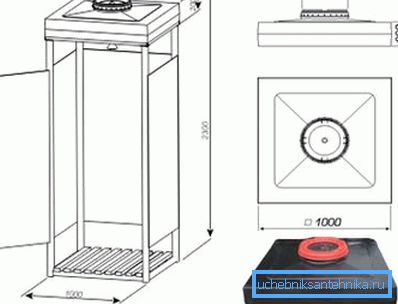
- On the top trim we lay either wooden beams or steel corners. These elements will play the role of rafters for the roof, as well as supports for the tank with water.
Note! If you plan to install a factory capacity, then under it you can initially make a frame of a suitable size.
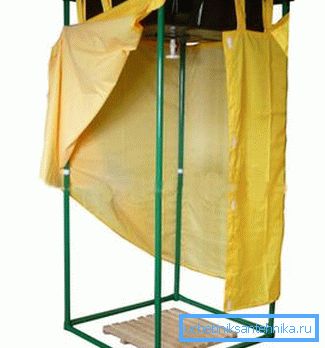
As for the trim, the instruction allows the use of a variety of materials. Each of them has both advantages and disadvantages:
| Material | pros | Minuses |
| Clapboard |
|
|
| Decking |
|
|
| Plastic panels |
|
|
| Polymeric canvas |
|
|
That is why before making the final choice of material for covering the walls of the booth, it is worth analyzing all the available varieties, assessing their strengths and weaknesses.
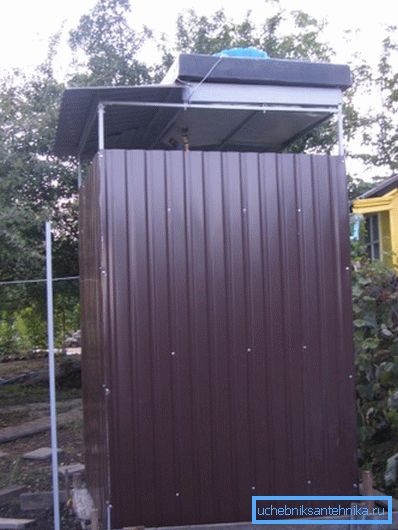
Tank and equipment
The final stage of the work involves the installation of a water tank.
Here you can choose from the following options:
- Hard plastic or metal tank. Well suited for outdoor booths, and for the shower in a private house, equipped with an extension. For more effective heating in the sun it is worth painting the container black.
- Fabric tank, which is filled when connected to the water supply. This type has appeared on sale relatively recently, but has already managed to gain a certain popularity. Such a tank weighs a little, so it is well suited for light frame booths.
Note! Such containers at the time of departure should be removed from the shower stall in order to avoid theft.
- Any closed container of suitable capacity.. For the shower, you can use a barrel, eurocube, small tank, etc., the main thing is to wash them from the inside until all residues of substances are removed there.
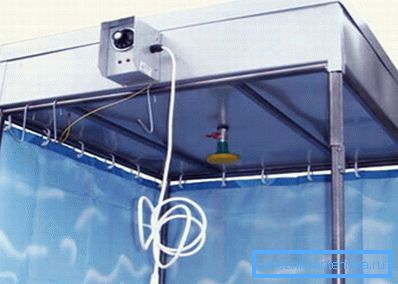
In addition, you can equip the shower with a flow heating system. In this case, we acquire a special heater (it can be used not only at the cottage, but also in the apartment) and we build it into the booth water supply system.
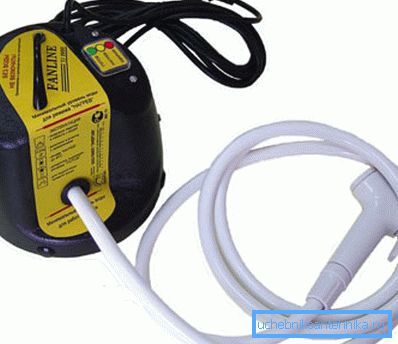
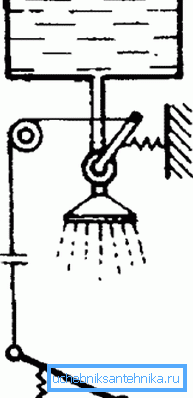
After installing the tank or the flow heater from the inside, we fix the shower head with a tap. You can also install a pedal drive that allows you to control the flow of water by pressing the legs.
Then we can only equip our shower with trifles: a shelf for soap and other accessories, hooks for towels, clothes, etc. After that, the design can begin to use as intended.
Conclusion
Self-made summer shower in the country, built on the above algorithm, can serve at least ten years. At the same time for its construction, we do not need any expensive materials or specific skills - it is enough to follow the recommendations outlined in the text and voiced on the video in this article.