Shower floor - how to make an effective drainage system
If you want to figure out how to properly make the floor in the shower when the design is assembled without a pallet, then this article is for you. Most people are confident that this type of work is very complex and can only be carried out by professionals with extensive experience. In fact, the design is fully capable of making anyone, it is important to know the technology and follow a few simple recommendations, this ensures the achievement of an excellent result.
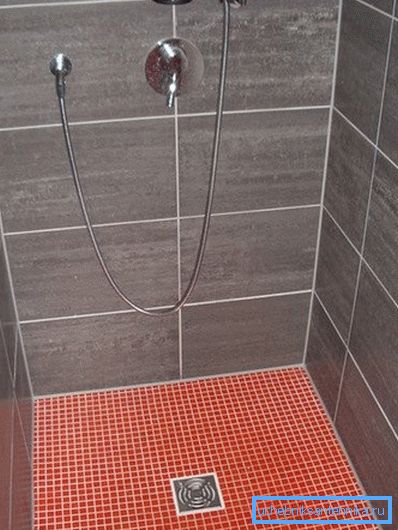
The main differences of this option
If you have not decided what to choose - the traditional pallet or the floor laid in a special way, then this section will tell you what advantages the second option has:
| Style | A variant of a shower without a pallet is very often used by stylists when designing original interiors. The situation turns out to be very interesting and unusual, in the west this solution has been widely used for quite some time, in our country relatively recently, but there is no doubt that its popularity will increase every year. |
| Versatility | You can use this technology for designs of any size and shape. The floor of the shower stall is done under a certain incline, and no matter what size it is, the efficiency of the system will be the same, provided that all the inclines are observed and the shower drain system is made qualitatively. |
| Efficiency | The price of high-quality pallets is quite high, here you will need inexpensive materials, and the only additional acquisition will be the ladder, which is responsible for the rapid descent of drains. It is not worth saving on its quality, since any malfunctions can lead to the need to destroy part of the floor. |
| Simple workflow | Despite the apparent complexity of the work is very easy to do it yourself. The main thing to do everything in stages and use quality materials. At the same time, while observing all the requirements, the result will not differ in any way from the work of professionals who take impressive money for it. |
Note! A very good advantage is the lack of thresholds at the entrance to the shower compartment, this greatly simplifies the use of the system by the elderly and children, and reduces the risk of slipping.
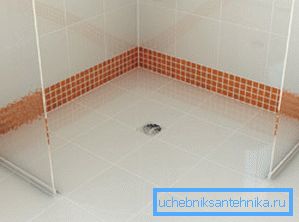
Features of the work
We will consider what the nuances are the most essential, and it doesn't matter if you make the floor for a country douche or equip a surface in a city apartment - the technology is the same, and, knowing it, you will cope with the work in any place. It is very important to foresee such a design in advance, since it is necessary to leave a cavity 15 cm deep when filling the screed to carry out all the required measures to establish a reliable flow.
If the floor is made in the summer shower, then naturally there will be no cavity, just the process of pouring the base will be somewhat different from the usual
Primary work
A very important stage on which the reliability and durability of the future structure largely depends. The works may differ: if they are carried out in the house, then everything is simple, and for the dacha variants it is necessary to fill the roughing screed 15 cm below the planned level of construction.
Follow these steps:
- If the shower is located on the street or in the dacha annex, then do not forget to lead the sewer pipe to the construction, do not miss this nuance, as it is very important, the same applies to the apartments - the sewage system should be brought to the site where stock.
- In advance, purchase a drain construction, which is called a shower drain, it is this element that will be responsible for draining the water, so you should choose a quality and reliable unit.
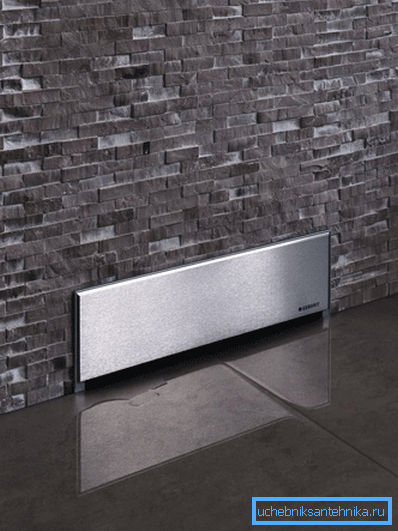
Note! Not so long ago, ladders built into the wall appeared on the market. This is a very interesting solution that will allow you to work without any difficulties: the drain is made in the direction of the wall, and the water goes through a special slot, now you can not worry about the correctness of the slopes, the only problem is that you can not find such a design in all cities of our country.
- First of all, you need to attach the sewer system to the drain node, do it as reliably and efficiently as all the elements will be located under a layer of concrete.
Note! To strengthen the joints, you can additionally strengthen all the joints with sanitary sealant, which not only strengthens the system, but also perfectly resists mold and mildew, which is important when operating in conditions of constant humidity.
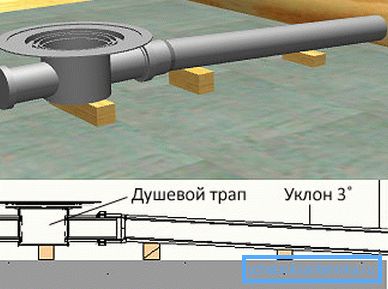
- Next, it is necessary to warm and soundproof the surface using foam plastic or extruded polystyrene foam 5 cm thick, sheets are cut into the pipes and the shower drain so that the insulation is as tight as possible and also fixes the position of the structure.
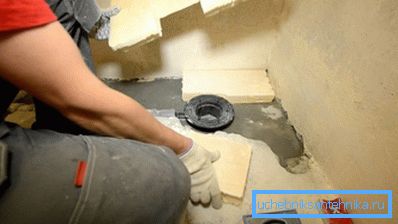
- Thin strips of insulation 3-4 cm in height are glued along the perimeter, they will simply determine the level of the screed, and in the future they will perform the function of expansion joints to prevent cracking of the screed when temperature and humidity drops.
- After that, the solution is kneaded and an initial tie is made, which is leveled using the rule. A wide rubber washer in the ladder will be located approximately at the level of the first layer of concrete.
- When the concrete hardens, it is necessary to waterproof the base, for this is taken a piece of stekloizol 50 to 50 cm, and a hole is cut in it according to the diameter of the internal drain. After that, this fragment is pressed with a special washer, which is fixed with screws.
- When the first stage is completed, a piece of waterproofing material should be cut out according to the size of the future structure, before laying the lower layer is heated and glued to the base, pay special attention to the area around the drain (a hole with a little more fixing washer is cut in the material). Strips of stekloizol are glued along the walls so that they enter the walls at least 15 cm.
Device top of the system
After waterproofing, you can proceed to further work:
- First of all, a siphon with a grill is installed in the body of the ramp, it is quite simple to do this, especially since the system always comes with instructions that contain all the necessary circuits.

- Now consider how to make a slope in the shower, first of all, you will need either special perforated profiles, which are immediately made with the desired slope, or wooden slats, which will have to be cut at a certain angle. The elements are arranged around the perimeter so that from any point of the shower space the water goes to the grating of the ladder.
- The device of a coupler is made very accurately, It is important to choose the optimum consistency, so that the solution does not flow, but retains its shape. The surface is leveled with a foam grater, special attention should be paid to a correct and even slope.
Further work depends on the features of the object, if we consider how to make the floor in the shower at the dacha, then most often the walkways just fit up. But the surface of the concrete is better to cover with a protective compound to increase the strength.

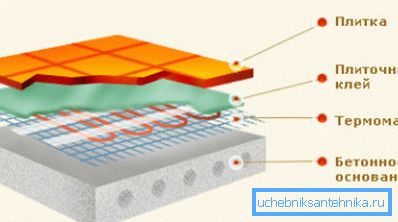
If you decide to make a warm floor in the shower, then you should remember that the work should be done very high quality:
- For the operation of the system, a separate wiring line is laid.
- Be sure to install a residual current device (RCD), which will ensure safety.
- It is necessary to purchase a double-insulated heating cable, this will ensure the required safety of the heated floor in the shower.
- After the installation of the system, it is possible to lay ceramic tiles; this can be considered to be completed.
Conclusion
The video in this article will tell and clearly show some important points of the workflow, so be sure to watch it. As you could see, the work is not as difficult as it seems, and you can make a comfortable and reliable shower drain without assistance.