Shower gang - an important element in the arrangement of the
With such a concept will have to read if a shower in the house is planned without a pallet. The water flow in this case will be organized directly through the floor, most often for this is used a shower drain under the tile.
Fortunately, the device is inexpensive, and all installation work can be done without the help of experts.
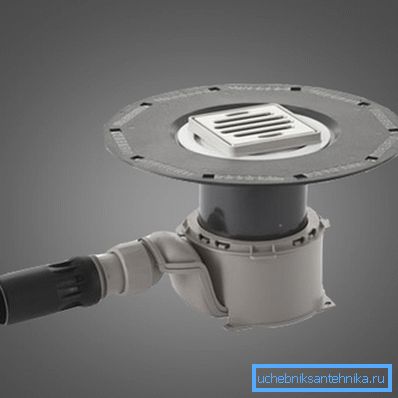
What is the ladder, its difference from the channel
The ladder for organizing the flow of water into the sewer system is needed only if there is no pan in the shower. Otherwise, a separate ladder for the shower tray is not needed. Sometimes they are discarded from pallets for aesthetic reasons, a shower stall with a shower mounted in the ceiling looks particularly impressive.
Note! Sometimes a shower without a tray is a necessary necessity. For example, in the case when elderly people live in the house, it can be difficult for them to overstep the high edge of the pan.
In this case, the stock can be organized in 2 ways:
- using the ladder - externally, this device looks like a 4-angle or round grille in the floor, into which water is directed from the floor;
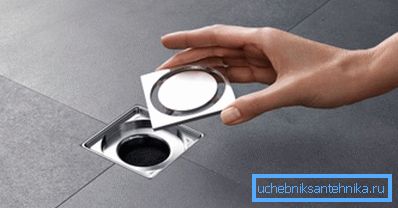
- using special shower channels. Some people confuse them with ladders, but they have nothing in common. The channel has a greater length and a smaller width, can divert more water.
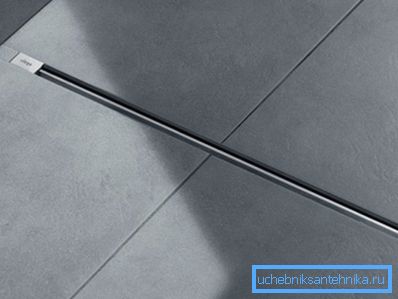
Shower channels and ladders in addition to purely external differences also have a number of features during installation and operation:
- the canal can be recommended to use when it is necessary to drain a large amount of water. For example, in the public soul;
- trapeik is usually placed in the center of the booth, so the technology of performance of work is somewhat complicated. The fact is that it will be necessary to ensure the slope of the floor towards the discharge point from 4 sides; in the case of a channel, a 2-sided slope is sufficient;
Note! In addition to the complexity of the work, the appearance of the floor suffers. After all, the tile when facing will have to cut diagonally. So, only the version of a tile with an abstract mosaic will do, but it will not be possible to lay out a beautiful image, and seams will stand out against the background of a monochromatic tile.
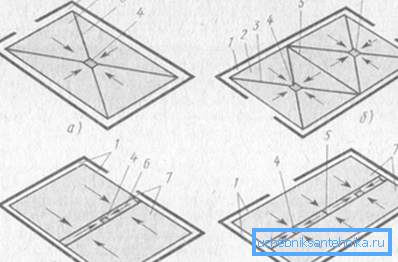
- in the case of the channel, you can limit yourself to a very small slope of the floor (about 1?); for the ladder, the slope will have to be slightly increased;
- You can also note the different cost of channels and ladders. Of course, a lot depends on the model and the manufacturer, but, for example, the simplest ACP EG trap with a siphon will cost about 3000-3300 rubles, but the price of the same manufacturers channel does not fall below 10,000 rubles.
Given the difference in cost, buyers more often stop their choice on the ladder for the soul, and not on the channels. Moreover, in the home there is no need to drain a large amount of waste.
Classification of shower drains
Despite the fact that all models, without exception, solve the same simple task, there are quite a few differences in the design of such devices. In order not to miscalculate when choosing, it will not be superfluous to familiarize yourself with the classification of the ladders. Traps for shower rooms can be classified according to several criteria, we list the main ones.
By type of material, you can select:
- cast iron models - are not used in everyday life because of the high cost and heavy weight. It is possible to mark the striking durability and resistance to mechanical stress - an excellent choice for heavy duty operation in industrial production;
- stainless steel ladders - similar models can be used both in administrative and residential buildings. They are distinguished by ease of cleaning, which is highly appreciated in cases when increased sanitary requirements are imposed on the room;
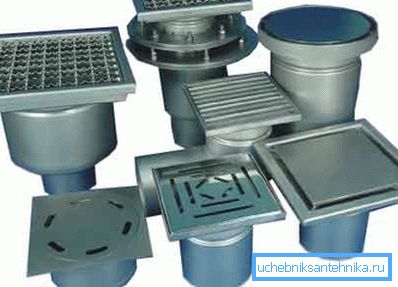
- most often in ordinary apartments are installed plastic ladders for showers. They are durable, strong enough and cost a little. At the same time, the decorative lattice itself is often metal, which confuses many.
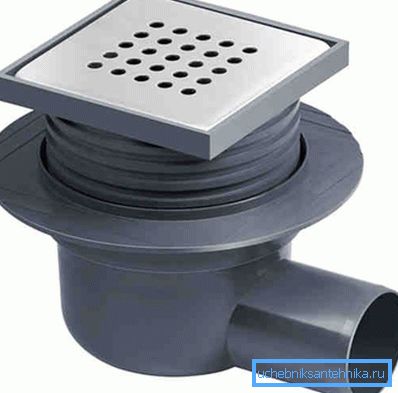
You can also classify them by form.
This refers to the shape of only the upper part and the decorative grille, there are:
- square models;
- rectangular;
- round.
Another important design feature is the direction of flow, you can select:
- horizontal ladders - in this case, water after entering it through pipes hidden in the screed is supplied to the sewer riser;
- vertical - they are much more productive, but they can not be installed in any apartment.
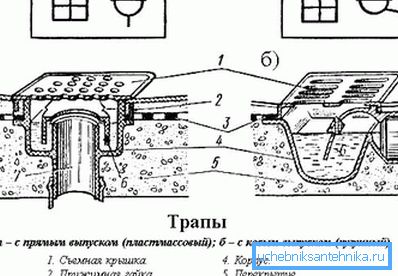
Also the dimensions of this item are different. The most popular sizes can be considered the range from 70x70 to 180x180 mm, with regard to height, it can vary in the range of 75 - 180 mm.
Note! It is necessary to take into account that the carrying capacity of ultra-flat ladders is approximately 2 times less than that of ordinary ones.
And the last thing to note is the type of siphon (this is important to prevent sewage odors in the shower).
You can highlight:
- models with water lock;
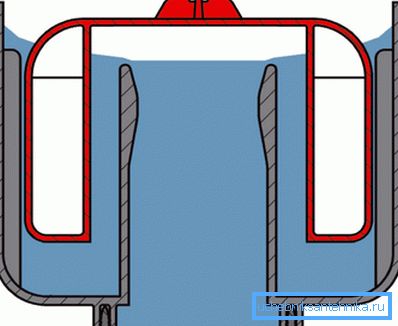
- dry shutter;
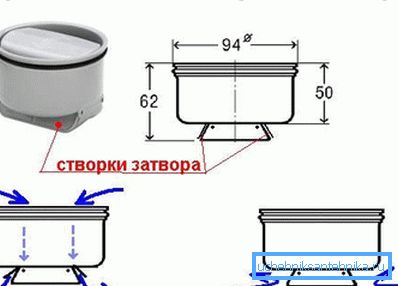
- with mechanical shutter.
On the selection and design of the ladder in the shower
Given that after replacing the installation ladder will be somewhat problematic, the choice must be approached responsibly. It is necessary to take into account not only the appearance and form, but also the bandwidth of the device. Only after that you can go directly to the practical part.
How to choose a suitable shower drain
When shower drains and sinks for showers are selected, its carrying capacity is the main criterion. If the flow exceeds it, the water will stagnate on the floor, but there is little pleasant in it.
It is definitely possible to advise not to chase the cheap, given that the ladder in the shower will last more than one year, it is better not to save on it. It cannot be said that cheap models are very bad, but there are a lot of minor flaws. For example, it can quickly dry up the water trap (or it can be torn off), it does not affect throughput, but the sensations when visiting a shower will be far from pleasant.
Note! Of course, you need to select a lot of ladder individually in each case, but on average there is enough flow capacity of about 0.7 l / s.
In some cases, it may be appropriate to install 2 ladders. This option is resorted, for example, if ultra-flat models with low bandwidth are used.
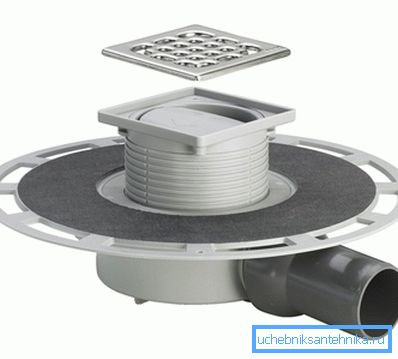
Device of a shower
Despite the abundance of models from different manufacturers, the device of the ladders is not much different, the main elements remain almost unchanged.
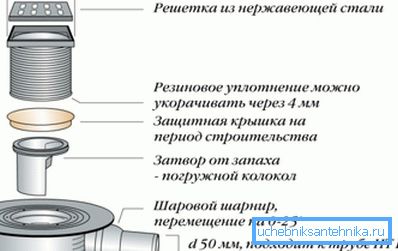
You can select such parts of the structure as:
- the grille - after all the work has been done, only this part will be visible, the rest of the communications will be hidden in the screed. In addition to the decorative function of the lattice also acts as a barrier, delaying large debris;
- below can be a glass of perforated metal (in the reference documentation can be called a waste basket). At this stage, there is a more thorough filtration of wastewater;
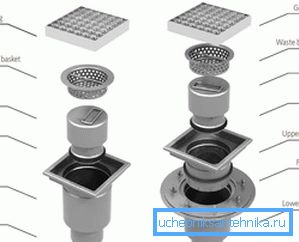
- rubber seals can be cut through 4 mm, due to this, during installation it is possible to adjust the height of installation of the ladder;
- the shutter is further located to prevent the penetration of odors into the room;
- well and most importantly - the body of the ladder with a tap.
Note! When installing the shower ramp, it is sometimes necessary to rotate the outlet. For this, quite often a hinged connection is arranged on it, which allows it to be rotated through an angle of up to 25-30 ?.
Installation Guide
By and large, the whole process boils down to installing the ladder itself when creating a tie in the shower and creating the necessary slope so that the water can flow to the drain hole without any problems.
This goal is achieved in 2 stages:
- first, the main layer of the screed is arranged (so far without a slope), at the same stage the body of the ladder is installed;
- then the second layer of mortar is poured in and the necessary slope is created here, after which the tile is laid and the work can be considered completed.
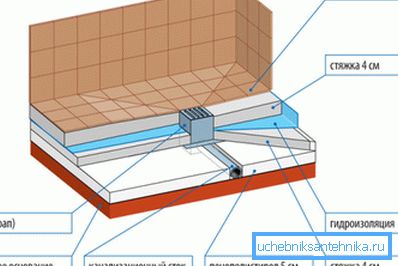
Beginning of work
The entire installation process can be done without any problems with your own hands, it is recommended that you only follow the suggested procedure:
- First comes the fitting of the purchased trapik. In the concrete base by this time pipes should already be laid. The body is simply installed in the right place and the pipe is selected to connect it to the sewage system;
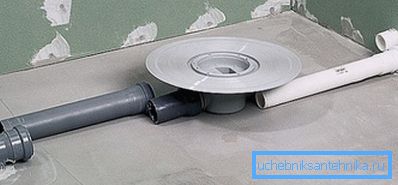
Note! Traps are usually located close to the sewer riser, so there is no need for ventilation. But if it so happens that the distance from it to the riser exceeds 3.0 m, then a ventilation pipe can also be envisaged, it will also be disguised in a screed and attached to the body of the drain on the reverse side of the effluent outlet.
- then you can go two ways - just go to laying the cement-sand mixture on the base (after fixing the ladder itself) or first go to the insulation. You can simply lay on the floor thick foam sheets, it is important that between the plane of the plate and the laid foam sheets there is a distance of at least 2-3 cm, otherwise the screed will be too thin;
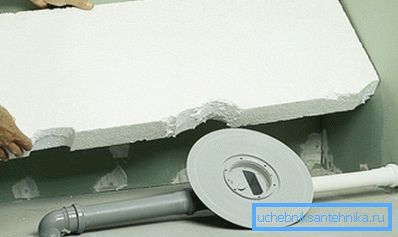
Note! In the next stage, the device of the ladder in the shower floor will require alignment of the solution layer, and for this you need beacons for the rule. Since the dimensions of the shower stall are small, instead of the usual lighthouses around the perimeter of the room it is possible to glue a foam band to the wall, its surface should be in the same plane with the siphon plate.
- There is nothing unusual in laying the mixture - just gently level it and smooth the surface with the rule. To insure the hole of the ladder, you can close the protective cover (it can be included) or just stick it with tape, if the solution gets into it, it will be difficult to remove it and there may be problems with the drain, evenness is checked by level;
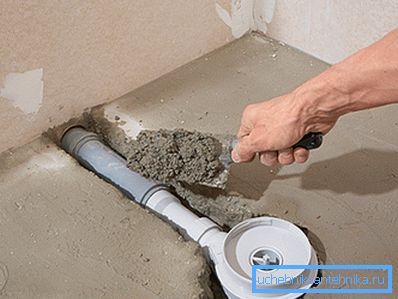
- after the solution has hardened, you can proceed to the next step. First you need to do directly by the ladder - a small piece of the built-up roofing material is used (for waterproofing), it must overlap the plate a little in size, you need to make a hole in it and put it in place;
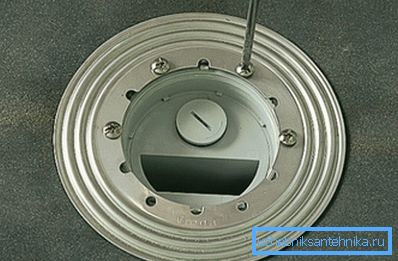
- then the instruction requires the installation of a metal ring on top of the siphon; it is fixed with screws and reliably presses the previously laid sheet of roofing material;
- then you need to arrange a waterproofing layer over the entire area of the screed. The same roofing material is used, it is simply fused onto the base (the hole in it must be made with a diameter larger than a metal ring).
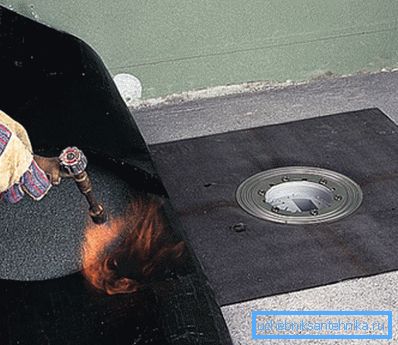
Note! In the corners, strip of ruberoid with an overlap on the wall is additionally fused.
- This is followed by installation into the hole of the upper part of the structure with a decorative grill on top (previously, the drain for the shower cabin under the tile is adjustable in height). The hole is sealed with tape;
- Before laying the solution, you need to install guides that will set the slope of the floor surface, you can use thin wooden slats or foam. It will take at least 4 of these guides;
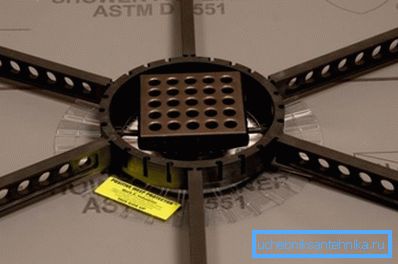
- the solution is laid and leveled;
- after drying in the corners, waterproofing mastic is applied and tile is laid.
According to the proposed instructions can be installed almost any shower trays and ladders. Individual parts may change (for example, the presence or absence of a heat-insulating layer), but in general the sequence of actions remains the same.
In conclusion
Without installing the ladder in the shower is not enough if you do not plan to install a pallet. At the same time, the installation works are not particularly difficult, it is enough to simply connect the drain to the sewage system and pour the screed in 2 stages. The proposed material covers the installation issue in great detail.
The video in this article schematically shows the installation of the shower ladder.