Stationary shower for a garden from a tree: manufacturing
Acceptance of water procedures in the summer period can be carried out on the street, however for this purpose a special construction must be constructed. For a long time, shower cabins for garden made of wood are popular.
Widespread primarily due to the availability of material.
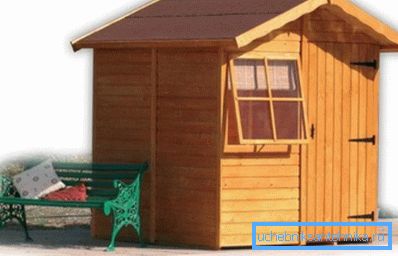
Learn more about the pros and cons
Before starting work on the construction of this object, it is recommended to find out about the positive and negative sides of this option. If this design suits all parameters, then you can proceed to the main activities for the construction.
The main advantages
- The low price of the material makes it possible to arrange relatively cheap objects for hygienic procedures.
- Ready-made structures are distinguished by high aesthetic characteristics, due to which they fit well into the landscape design of the site.
- The result is environmentally friendly design, as wood belongs to natural materials.
- With the help of wood, you can build buildings of complex shape, which gives a large number of variations for design.
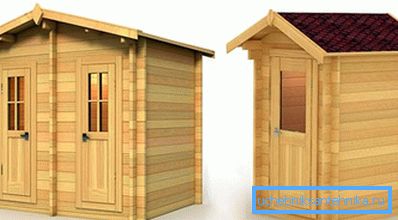
Some disadvantages
- Without additional treatment with antiseptic agents, the life of the structures is not very long.
- The likelihood of fire in dry weather when exposed to an open flame is quite high.
- Over time, drying occurs, so the elements of the structure can to some extent change the shape and size.
Reference! The mechanical characteristics of the material are largely dependent on the breed, humidity and location of growth of a particular tree. In this regard, we can talk about the complexity of the choice of finished products for construction.
Basic stages of construction
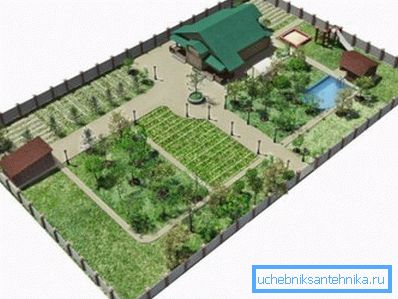
If necessary, a shower cabin can be made in the garden with your own hands, but first you have to find the right place. For this structure it is better to take the solar plot, which is located away from other objects.
If heating will be carried out by artificial means, then reduced requirements are placed on the location of the structure.
Work on the foundation
First you need to build a foundation for the future structure. To do this, with the help of a simple spade a ditch of 20-30 cm deep is pulled out.
Its dimensions should be 5-10 cm higher than the dimensions of the wooden structure itself. The bottom of the pit is completely covered with sand, and the layer thickness should not be less than 10-15 cm.
Formwork is made around the perimeter of OSB sheets or other available materials. The width of the tape should be 5-10 cm more than the thickness of the future walls. To improve the strength characteristics of the foundation part, reinforcement is made using a metal grid.
In the course of work, concrete M150 can be used, for the preparation of which the following proportion is relevant: 1-cement M400; 3,5-sand; 5,7-gravel. The finished composition is poured into the installed formwork. After the mixture has hardened, the holding structure can be disassembled.

At the next stage, the inner part is concreted to form a single plane with a slight slope to the drain hole. In the future, the lower part will be trimmed with ceramic tiles, but before that a minimum of 28 days must pass for the solution to gain the necessary strength.
Walling
After the foundation is set up, you can start making a summer shower in the garden directly from wood. For this, bars of 6040 mm cross section and lining panels are required for finishing work from the outside.
Detailed instructions for making walls are given below.
- First, the walls are assembled from bars on the ground.. Regardless of the size of the structure itself, the distance between the uprights should not exceed 40 cm. Strengthening of the structure is done by installing transverse strips.
- After the walls are made, they are installed.. They are put on the foundation and are knocked together with the help of nails or screws. Fixation is made from the inside.
- Finished construction outside lined with clapboard. To hide fasteners it is necessary to use cleats or finish nails that are driven through the ridge.
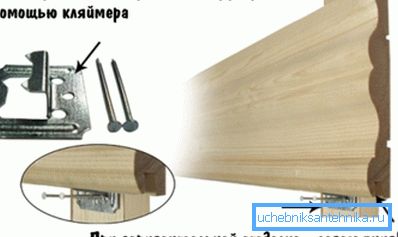
Addition! It is recommended that the frame and wooden panels be immediately treated with a protective compound from all sides, otherwise it makes no sense to talk about the durability of the structure.
Roof structure
The simplest and at the same time aesthetic option is to build a double-slope roof with a slight incline. This will require bars of 10,050 mm, a cut board with a thickness of 25 mm and profiled sheets, which are fixed to the crate with special self-tapping screws with rubber pads.
The rafter system is made of bars with a section of 10,050 mm. The lower part is mounted on the edge of the frame, and the upper part comes down with another level in the ridge. First, the extreme elements are installed, after which the rest of the rafters are exposed along the cord.
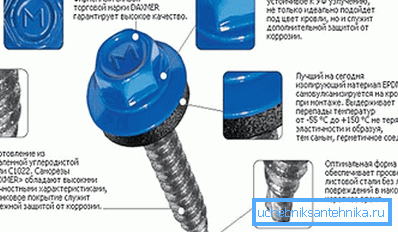
In increments of at least 30 cm, the crate is made of edged board. Fixing slats can be carried out as screws, and nails.
After preparation of the supporting structure, profiled sheets are screwed. Along the edges are usually installed end strips.
Interior finish
After completion of the roofing, you can begin facing the walls, the ceiling and the concrete bowl. Ceramic tiles will be required to finish the lower part, and plastic wall paneling is quite suitable for wall and ceiling cladding. The process of working with these materials is described below.
Tile operations require the preparation of a cement-sand mortar. As a rule, three fractions of sand are put on one part of the binder. Before adding a filler, sifting is required to remove foreign objects.

When laying, the covering fragments are leveled with a level. Plastic crosses are installed between them to ensure an even seam.
If necessary, the tile is cut with a special tool. After completion of the main work is done grouting the joints.
Quite often, showers for the garden are trimmed inside with vinyl clapboard, which is resistant to moisture. It can be attached to the transverse bars with small metal brackets. Between the elements on each side there should be a gap of 5-10 mm to compensate for thermal expansion.

Installation of a tank and watering can
Directly to the roof of the tank is installed for a shower with or without heating. For this, a special playground is made of wood.
The lower plane of the structure should correspond to the slope of the slope. From above in horizontal position there will be a water tank.
From the tank is held a flexible hose or pipe. For this, a hole is drilled in the wall corresponding to the diameter of the conductive element.
After the watering can is attached, it is fixed to the ceiling with special fasteners. At the same time, all joints are sealed reliably so that there are no leaks.
As a conclusion
Studying the above information will allow individual developers to understand how to make a shower in the garden with their own hands, thereby saving financial resources. For an example, quite accessible materials were taken, providing the opportunity to build a not very expensive stationary type structure.
The most complete information on this subject can be obtained by viewing the video in this article.