The installation of water wells: important principles of
This is probably something from the category of modern innovations - water supply to the house on the summer cottage from the well. Nevertheless, this incredible construction, twenty years ago, is now becoming obvious and quite widespread.
And all thanks to the development of new wiring schemes, and, most importantly, very reliable equipment supporting these schemes, which has become available everywhere. As for the organization of the well itself, it took quite a few additions.
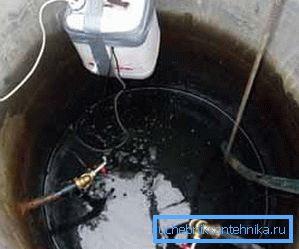
Well in the general system of water supply at home
But first, about the unchanged, what remains of the previous requirements in the organization of wells, which has already come to the water supply system.
What we have and what we value
Firstly, it is still necessary to arrange the bottom of the well very carefully - ideally, all sludge is completely removed and the following multi-layer structure is created:
- A - a layer of fine, heavily rammed sand;
- B - there is already coarse sand;
- C is a layer of shungite, an ancient mineral that possesses remarkable healing and abstinent abilities; such use of this stone is often found in the organization of wells since ancient times;
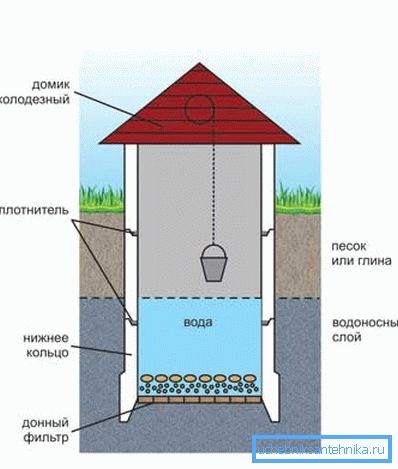
- D - a layer of high quality coal; Coal also contributes to improving water quality and protecting it.
- E - quartz coarse sand;
- F - silicon gravel.
Helpful advice! We advise to use, in addition to the sand after high temperature processing, on the lowest layer in the organization of the bottom of the well. The two upper layers are often combined into one. How the bottom of your well will be organized is ultimately up to you, but we advise you to always strive for just such a multi-layered defense organization.
Secondly, it is necessary to organize on the surface a powerful protective clay castle that will prevent melt and rainwater from getting inside. The view of the well with the clay castle will be the following:
- A is the main part of a clay castle adjacent to the well;
- B - the entire castle is constructed around the entire perimeter (preferably round, no matter what form the well itself) with a slight downward slope and a distance of at least one and a half meters from the nearest one to the well;
- C - mainly the castle consists of a well-compacted mixture of clay, sand and small gravel;
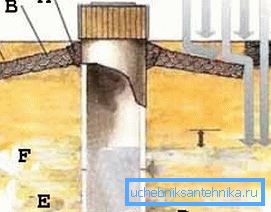
The whole environment of the well is represented in the figure:
- D - design of the bottom of the well;
- E - the aquifer itself;
- F - the upper waterproof layer, often a mixture of sand with stones or river sediments;
- G - the direction of rain flows, thus it becomes clear why the lock should be made at an angle of at least 1.5 meters from the well.
Thirdly, the construction of the castle (part “A” of figure “A”) may be accompanied by the creation of a more serious protection using waterproofing foam blocks and plastic film.
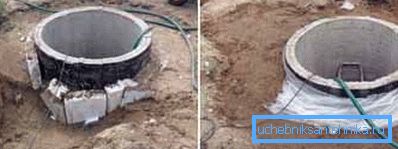
Fourthly, it is very useful, not counting on the fact that a clay castle will prevent water from entering from the sides, to build cement side filters that are known of three types:
- A - direct exit;
- B - oblique exit, rise to the inner side of the well;
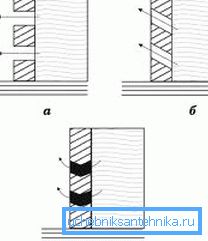
- C - cone-shaped exit, rise, again, towards the well.
Explanations for Figure “B” - configurations of cement filters:
- The basic idea of cement filters is that no matter how much one wants to protect oneself from collecting moisture on the sides of the well, no matter how big the clay castle may be, this cannot be done 100%;
- therefore, so that the water still does not stagnate, she is given the opportunity to go to the well, but through specially equipped filters in the well's body.
What new requires plumbing
The desire to use water from a well will require some additions.
Innovations
Firstly, if you are not going to use the well from above, you can not create a roof, but it will be necessary to close the top securely with foam plates.
Secondly, carefully isolate the discharge of the water supply system from the well body, and this outlet and the further pipe should go below the level of soil freezing in your area.
Thirdly, correctly install the pump relative to the bottom of the well, if your choice fell on the submersible pump. There are two options here:
- if the water level in the well and the vertical dimensions of the pump allows, then install it vertically no closer than 50 cm from the bottom, and this is the preferred option (figure “D”, option “A”);
- if the water level is insufficient, install the pump horizontally, but already a distance of 15 cm - this is very small and if no special actions are taken to organize the bottom (given above), then from the bottom the pump will lift sand, silt and sediment (figure “D”, option “B”).
As a result, we have
If all the conditions are met, then as a result, the device of the water supply system from the well will look like a very reliable system that fully meets its objectives:
- A - in the general case it is not recommended to install the pump horizontally, but if all the same circumstances force, then this distance of 15 cm should be minimal;
- B - if the pump is located horizontally, then you cannot do without a flexible hose;
- C - non-return valve - a mandatory element of all such systems;
- D - a pipe with a diameter of 32 mm (possibly 25);
- E - standard distance with vertical installation of 50-70 cm, but it depends on the pump power - in general, the more powerful the pump, the higher it is installed;
- F - safety valve of water drain in case of force majeure circumstances; Often this drainage is placed on the ground above, but then it must be moved as far as possible from the well, at least by the size of the clay castle;
- G - warming plates, which here, at the ground, are possible, but not at all mandatory;
- H - electrical outlet - in this situation and in any other when organizing electrical wiring in the open air, pay special attention to protection from environmental exposure;
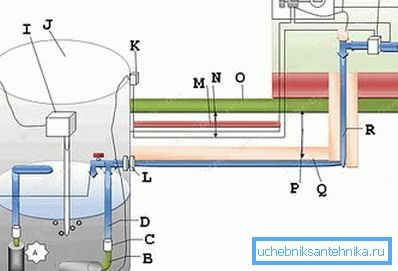
- I - compressor, we recommend using the device with air saturation inside with oxygen (aeration), which will be an additional means of combating impurities in water;
- J - well;
- K - power socket again;
- L is the responsible exit from the well into the house water supply system;
- M is the protective element of the electric cable, but it is recommended to run the cable through a more reliable corrugated pipe;
- O - electrical cable; Usually laying is carried out at a depth of no more than 70 cm, but it is desirable that this level be below the level of soil freezing;
- P is the depth of frost penetration;
- Q - warming;
- R - pipeline;
- S - the entire system must be grounded;
- T and V - automatic plug of the overload protection system at 5 and 25 A;
- U - what is called, the know-how of this scheme of water supply - the cable that performs heating of the pipeline;
- W - pump protection element from “dry” work when there is no water, or from overflow of the system - low and high pressure relays.
findings
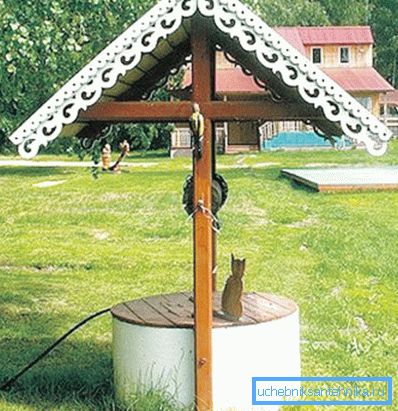
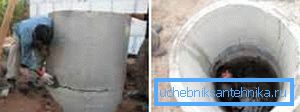
When the point of drilling is precisely defined, when the well is dug, its organization with the help of concrete rings does not take much time. Six meters of depth will provide you with six rings stacked on top of each other. But it’s just at first glance (see also the article “Plumbing in a private house from a well is a simple solution to complex problems).
Rings need to be carefully concreted, arrange the bottom properly and properly organize the soil around. Wells require a very scrupulous attitude, otherwise the price of mistakes is turbid and not possible to use water.
Be sure to watch the additional video in this article, there is an emphasis on some nuances that can not be forgotten.