The roof for the well: do it yourself
A well is a source, the water in which simply must be clean. To comply with this condition, you must have a protective cover. It can be a removable cover.
But this can hardly be called the best way to solve the problem. After all, such coverage should be removed every time and then put back, and this is inconvenient. More practical is the case when there is a well roof. How to create it, will be discussed in our article.
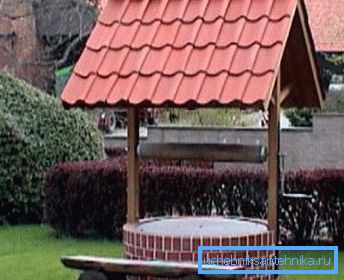
Types of Well Roofs
First, it should be noted that in total there are two types of such coatings.
We briefly describe them:
- a house for a well - such a building closes the well shaft from all sides. To access the well there is a door. The whole structure is rather massive and has a presentable appearance;
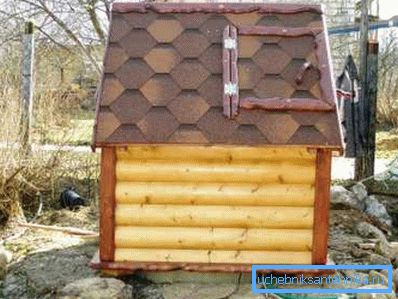
- sunshade - represents the roofing part established on support. Its device is simpler than the previous type and requires less cost for its manufacture. Below we will look at how to make the roof of the well in the form of a canopy.
Creation of a well roof
General recommendations
There are many variants of well roofs. But still, here you should adhere to one design rule.
It states that the roof on the well should have the same coverage as the house. Moreover, it should be done in approximately the same shape as a home roofing.
Tip! A canopy can have one, two, three or more ramps. We recommend sticking to the standard gable option. It is easier to implement when self-manufacturing.
Thus, the answer to the question of how better to sheathe the roof of the well is obvious. This should be the same material that covered the roof of your house. Due to this, the well fits perfectly into the existing architectural design.
Well Shed Assembly

Let's start with the preparatory activities. First we find wooden poles having a length of 3 meters. We will process them with antiseptic composition. It will protect the wood from the effects of mold and fungal microorganisms.
The lower part of the logs, which is planned to be concreted, is coated with bitumen mastic. This will provide additional protection against decay.
A further procedure for creating a roof for wells will be as follows:
- on the pillars we mark the place of the future fastening of the lifting gate - this is the name of the device by which a bucket of water rises from the well;
- the bottom of the pillars (70 centimeters) is wrapped with roofing felt or other waterproofing material - and not only the circumference of the log, but also its end part must be wrapped;
- we dig out pits with a depth of 120 centimeters - they will be required for installation of racks;
- we pour sand into the prepared depressions, pour water over it and we tamp it - as a result, we should have a sand layer 20 centimeters high;
- over the sand with our own hands we pour a concrete layer having a thickness of 30 centimeters;
- Two days after pouring, we proceed to the installation of the pillars - placing the first one in the pit, level it with the help of the building level. Having achieved a strict verticality, we fix the rack in this position and produce its fill with a solution of concrete. In the same way we put the rest of the logs;
- after a few hours from the moment of pouring, we proceed to the installation of transverse crossbars - for this purpose we prepare grooves on poles and uneven bars. Fixing elements produced with bolts. To enhance the widths set on both sides of each of them supports;
- The next item, which is set by our instructions, is the installation of longitudinal bars - at their ends, as well as at the edges of the transverse elements, we prepare grooves. After that, with the help of bolts, we fix the details;
- over the two pillars fasten the top bar. For its installation we use nails;
- we put the rafters - fix them to the longitudinal and to the top bar with the help of nails;
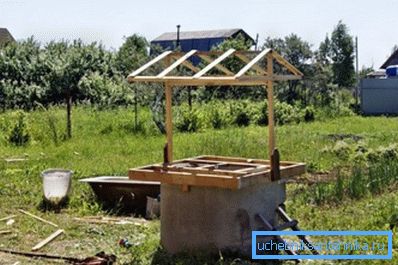
- we make a crate of boards;
- we put and fasten sheets of roofing material;
- fasten the ridge and end strips.
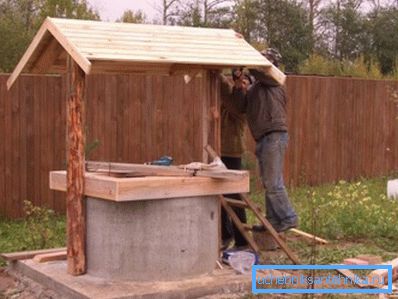
Tip! Not only pillars, but also all other wooden elements should be treated with antiseptic before installation. In this case, choose solutions from reputable manufacturers. The price for them is higher than for products of lesser-known firms, but at the same time, they have a longer effect.
Creating a lift gate
Consider the creation of the gate, which we will install on previously marked places on our pillars. For its manufacture, we first need to pick up a well-dried log, having a diameter of about 20 centimeters. Its length should be 4 centimeters less than the distance between the posts.
We clear a log of bark and we sand. The edges are covered with metal tape. This will help the billet not to lose its original shape during operation.
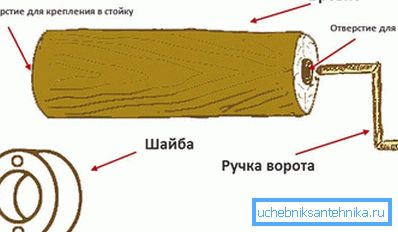
On the one and the other side of our part, we drill through holes 50-80 millimeters deep and 15-20 millimeters in diameter. Both openings are closed with steel washers.
In the pillars we drill the same grooves. They should also be closed with washers.
Tip! In the future, after installing the gate, between it and the uprights on one and the other side you need to put metal bushings. They will not allow the spindle to slide left and right.
In the holes prepared on the collar we drive in 2 rods of metal. The first of them, 20 centimeters long, is driven on one side, and the second, 100 centimeters long, on the other side. Then, from the second pin we bend the handle.
After this, our product is ready for installation. The installation process is completed by fastening a metal chain and hanging a galvanized bucket.
Conclusion
After thinking about how to make a roof over a well, you should take a closer look at the option of creating a canopy over a well. It is simpler in design and will require less building materials for its creation than a protective structure in the form of a house (see also the article The Pipe for a Well: purpose, types and installation).
The process of creating a well canopy ball is described above. You can learn more information on this issue from the video in this article.