Toilet and shower for the dacha: 2 options for the project
The shower and toilet for the dacha make up the minimum, without which a normal rest with comfort, perhaps, is completely impossible. That is why the arrangement of these premises should be dealt with as early as possible, ideally, at the stage of the construction of the country house itself.
In our article we will describe two options for solving this problem, and also give a sequence of actions for self-arranging a toilet with a shower.
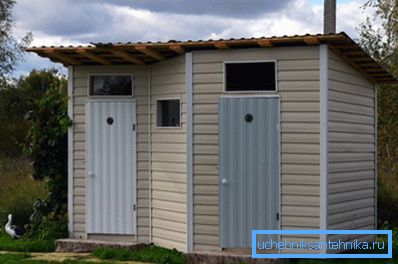
Option 1. Construction of a separate structure
Place for drains and base construction
If we decided to equip the toilet with a shower to give with our own hands, then the easiest way is to build a small cabin. It can be built on a wooden frame or completely made of brick, but in any case we need to build two rooms in it - the toilet itself and the shower room.
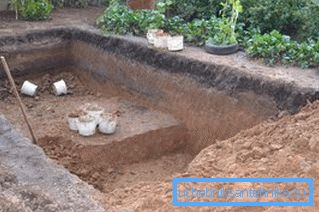
We begin the work with laying the foundation, or rather, with the construction of a drain hole or septic tank:
- On the selected site we dig a hole to a depth of 2.5 m. The area of the pit should be somewhat smaller than the area of the future structure. It is also possible to foresee a small protrusion of a depression for the rear wall of the structure - here we will make inspection hatches for inspection and pumping out the drains.
- Inside the pit we build a septic tank. For outdoor construction, two chambers are enough - a septic tank (located under the toilet) and a filtering well (located under the shower).
- Cameras are assembled either from concrete rings or from large-diameter car tires. You can also use brickwork or pour monolithic concrete walls, but in this case, the complexity of the task will increase many times.
Tip! We make the first chamber - the settler - as tight as possible, carefully concreting the seams between the elements of the hull and laying a layer of clay on the bottom. But in the lower part of the casing of the filtration well, on the contrary, it leaves holes for water, and we fall asleep about half a meter of drainage to the bottom - rubble or pebbles.
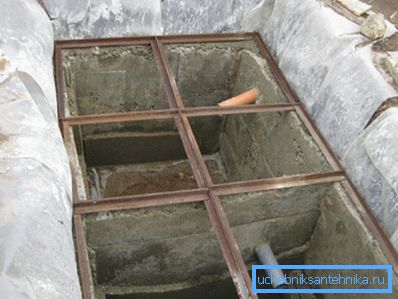
- At a distance of about 50-70 cm from the surface, we install an overflow pipe that will connect the sump to the filtration well.. From the side of the sump we supply it with a tee: it will allow to take water below the surface level.
- Pour the tape base around the perimeter, on which the above-ground part of the structure will be supported.. For casting, we use M150 - M200 concrete with reinforcement with 8 - 10 mm thick rods.
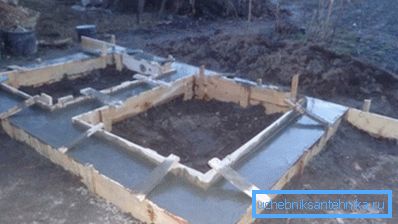
- From above we lay the slabs, leaving a hole under the installation site of the toilet seat in the toilet. Also in the floor is to provide a groove for laying the drain pipe from the shower to the sump.
- On the overlap pour the screed, which laid the drain pipe. The mouth of the drain in the shower should be placed at the level of the floor or slightly lower.
Construction and equipment of capital construction
After the base and the screed is completely dry, proceed to the construction and equipment of the structure itself.
Here we describe the principle of building a shower made of bricks, but in other materials on the site you can find algorithms for working on the construction of structures on a wooden frame.
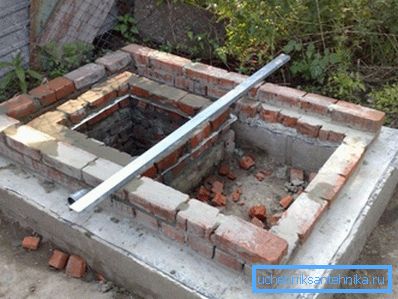
- Using ceramic bricks (the structure will not experience great loads, so we can take either the cheapest or the second-hand one) we build the walls of two rooms. The thickness of the walls is brick or half-brick, depending on whether you plan to use the toilet in winter.
- For masonry use cement-sand mortar. Additional reinforcement of masonry joints is rarely required here.
- At a height of about 1.5 - 1.7 m we lay window openings. In some cases it will be advisable to install glass blocks into these openings - so we will provide the lighting and maintain the proper level of privacy.
Tip! At the top of the wall must leave holes for ventilation.
- From above on the perimeter we lay the timber-mowerlat, on which we fix the rafters. On rafters we mount a single-sided roof and, if necessary, install a water tank.
- In the doorway we install the boxes and hang the doors. At the same time ensure that between the threshold and the lower edge of the door leaf there is a gap for the flow of air.
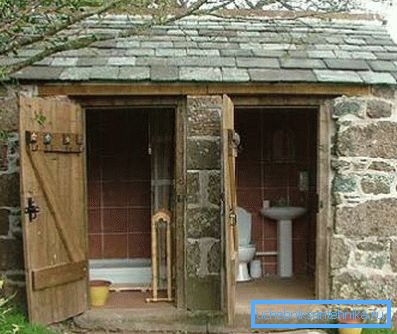
Outside the construction is usually left without plaster, limited to the jointing of masonry joints. As for the interior, the walls in the rooms we sheathe either with clapboard or with plastic panels.
We finish building the shower and toilet at the cottage with the arrangement of the premises: we install a toilet seat or a special plastic toilet for outdoor sanitary facilities, install a watering can with a tap, hang functional shelves and hooks on the walls.
Option 2. Arrangement of premises in a country house
How to equip the drain
However, the summer shower for the garden and the toilet, located on the street, is not suitable for everyone. So if you are planning to build a sufficiently spacious house, then it is necessary to allocate a room in it and under the bathroom. Moreover, it is best to begin work at the design stage, since the main difficulty here, as in the previous case, is waste disposal.
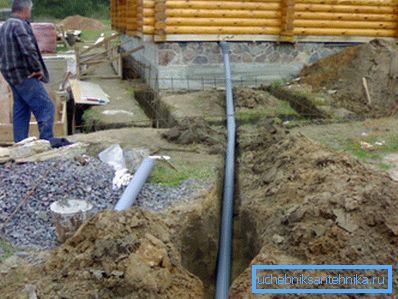
We perform the work as follows:
- To begin with, we equip a septic tank or cesspool according to the scheme given in the previous section.
- To connect a summer shower with a toilet for the dacha and a place to drain the water, we dig a trench about half a meter deep. At the bottom of the trench with a slope in the direction of the septic tank lay a sewer pipe with a diameter of 110 mm.
Tip! If the shower and toilet combined to give will be used in the winter, the pipe should be protected from freezing. To do this, we either bury it at least 1.5 m, or equip a warming loop made of mineral wool or polymer shell.
- In the foundation of the house we make a hole through which we wind the pipe into the underground space. The conclusions of the pipe are arranged in such a way that they are under the shower drain and near the toilet bowl.
As you can see, the process of arranging the flow is very time consuming, because it is better to perform all the work before the rough floor is laid and the flooring is laid.
Room decoration and installation of equipment
The toilet and shower in the country with their own hands settles themselves quite simply, but here it is worth paying attention to a number of small things:
- First, all surfaces must be carefully waterproofed.. The presence of a toilet and shower leads to an increase in humidity, and if you do not take action in advance, the appearance of the fungus is almost guaranteed.
- Secondly, in finishing it is worth using moisture-proof materials.. The floor is tiled, and the walls - plastic panels. You can use the lining, but in this case, the wood must be impregnated with special compounds.
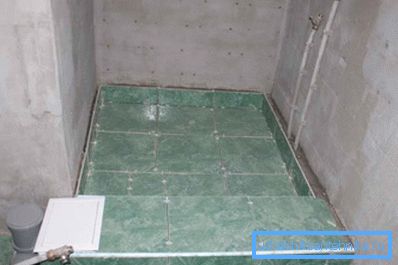
- Also, the instruction involves the arrangement of forced exhaust. To do this, install a fan in the duct, which is connected to the mains.
As for the equipment, such options are possible here:
- Since the room under the combined bathroom is usually allocated small, the toilet is chosen as compact as possible. Here the corner models are perfect.
- Next to the toilet is to install a wall washstand. Such a sink will be very convenient because it allows you to wash your hands and wash your face and brush your teeth.
- For the shower is best to get a closed shower enclosure. However, the price of such products is quite high, because many simply shut off part of the bathroom with curtains or sliding doors and install the tray directly on the floor, connecting it to the outlet of the drain pipe. This solution is also quite functional, but here the requirements for waterproofing the room and moisture resistance of the finish will be even higher.
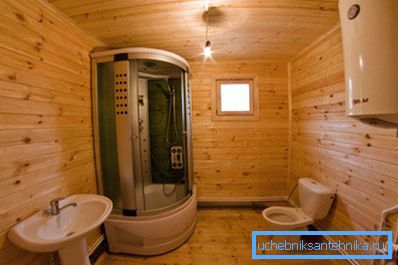
After the installation of the equipment is completed, we connect it to the water supply system, after which we perform a test run. If everything is in order and there are no leaks, the construction of the toilet and the shower in the country can be considered complete.
Conclusion
If you have not previously encountered similar problems, but have firmly decided to build a toilet with a shower in the country on your own, we strongly recommend that you follow the above tips. You will find a more detailed algorithm in the video in this article, so you should definitely look at it before starting the design.