We equip the suburban water supply from the well
It is very possible to equip the water supply system in the country with your own hands from a well, if, of course, this well is located in your territory, and not drilled into a clubhouse, and your neighbors also use it. The fact is that in the pipe you can put no more than one submersible pump.
And all its automation can be only in one place and the water-folding unit should be installed only after the pumping station. But this is a household, not a technical problem, and we are interested in installation work, which we will discuss below, and in addition, we will show you the video in this article.
Plumbing in the house
Well
Note. It should be noted that there are two types of wells - artesian and sand. The second option (it is smaller), you can drill by yourself, without asking anyone for permission and not collecting any information. But the artesian layers belong to the state, so to drill such wells you will need a package of documents and a paid license to extract water.
- By and large, when drilling a well, it should be issued a technical passport in which its flow rate, but, unfortunately, not everything is done in the way the law requires, therefore, you may have to determine this parameter yourself. It is necessary so that you know what power the pump can be used, more precisely, how many bathrooms the well will be able to maintain at the same time.
- To do this, you will need to mark the level of the mirror (do not use it at least for a day) and pump out all the water from the well, using the same pump that you will use, and then detect how long it will fill up to your mark - this one level is called static. Now you have to divide the volume of pumped water at the time of its replenishment, and you will get a flow rate - Vpumped water/ tfilling= well flow rate, which you can convert to liters per minute, per hour or m3/ min, m3/hour.
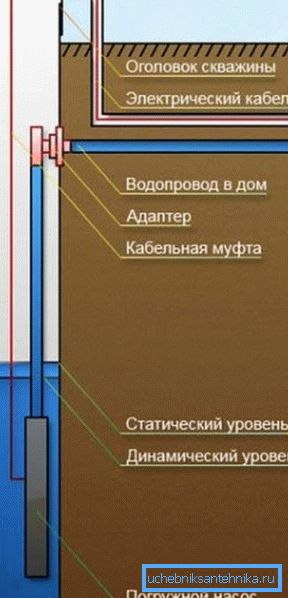
- Now you need a pump that you pick up the debit (m3/ hour), and you can see the parameters of the unit itself in the technical passport (instruction manual) or on the case. During installation, when you lower the pump into the well, do not fix it immediately - first start it and wait until the water level stabilizes, that is, the pumping will equal the replenishment. This will be the static level by which the immersion level of the pump should be measured (at least 30 cm from the mirror).
| Bathroom name | Water flow |
| Washbasin taps | 0.4 m3/hour |
| Bidet | 0.4 m3/hour |
| Toilet | 0.4 m3/hour |
| Sink taps | 0.7 m3/hour |
| Dishwasher | 0.7 m3/hour |
| Washing machine | 0.7 m3/hour |
| Shower cabin | 0.7 m3/hour |
| Hydrant for watering the garden (garden) | 0.7 m3/hour |
| Bath | 1.1 m3/hour |
Water consumption for an hour in different bathrooms
Trenches and pitholes
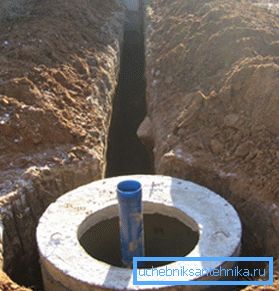
In any case, you will have to dig a trench leading from the well to the house, along which an electric cable will be laid to connect the submersible pump and the 32-mm water supply pipe itself - now for this, HDPE is used - low-density polyethylene.
The depth of the trench will directly depend on the climate in your region, it needs to be dug 50 cm deeper than the ground freezing point, so in some places it may be more than one and a half meters. The bottom must be filled with a sand cushion with a height of at least 2 cm - this allows you to evenly distribute the entire load on the pipe when it is sprinkled with soil.
If your country house is on a strip foundation, then it is quite possible that its sole is also below the freezing point and then you will have to pass not under the tape, but through it.
To do this, you have to punch concrete, which most likely has a reinforcing frame, so here you should not use a drill or a chisel as a nozzle for a perforator, but a drill and a chisel (if you stumble on it, then grinder it).
In order to have the opportunity to work freely in a trench with a perforator, from the outside and inside of the building, pitholes are dug out - the size is determined by your own dimensions.
For the convenience of preventive maintenance of the well is a well - it can be laid out of brick or concrete wide rings and close the top cover. Later, if necessary, the wellhead is insulated. Also. Instead of a concrete caisson, a downhole adapter is used, which we will describe below.
Adapter
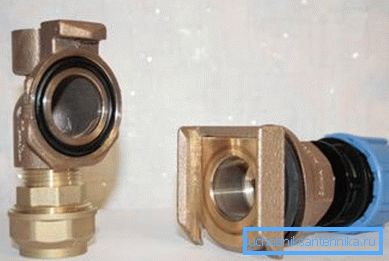
In cases where there is no possibility or simply the desire to install a concrete caisson, with which you can maintain the well head, resort to connecting the pipe through an adapter, the price of which will be much lower than the installation of a concrete well. Such a device is quite easily mounted below the ground freezing level, which we will now tell you about.

After the well is installed, the casing will be higher than it is required, therefore, the excess part is cut off by the grinder, leaving a piece above the ground that will be closed with the tip. After that, a hole is made in the pipe, below the freezing point of the ground, with a diamond mill or steel mill, for mounting this adapter.
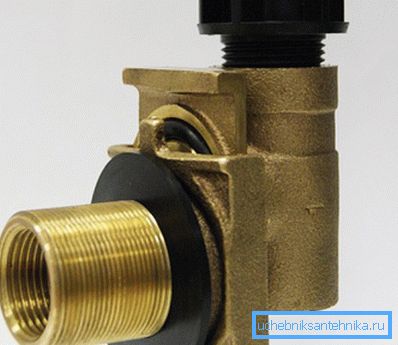
After we have made the hole, we disconnect the adapter into two parts - they just exit one of the other in the grooves, as seen in the top photo. The part that has a nozzle with an external thread (it is clear that a nut is screwed on it) is needed for mounting on the pipe.

It is quite simple to fasten it on the pipe - you just need to get the pipe from the inside with a pipe to the hole and fix it from the outside with a nut, but this is rarely possible only when the tip is below the ground level. If there is a long distance to the hole, then this part is lowered there with the help of a rod (the adapter is assembled and the rod is screwed onto another part of it) or wire.
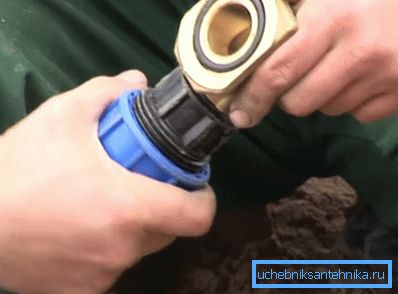
We start the assembly - we wind a check valve on the pump and measure a piece of plastic pipe from the valve to the adapter so that the depth of immersion in water is at least 30 cm below the static level (this concept was explained above).

Now we can proceed to the main and final phase of the pump installation - for this we will not be able to do without the rod that is screwed onto the inside of the adapter - this part is clearly visible in the photo, which shows how the adapter is disconnected - something like a black bowl on top.
So, now you need to first immerse the pump in the pipe, hold it by a flexible polyethylene pipe, and then continue diving with the help of the rod — immediately make a mark on it so that you know whether the inside of the adapter has reached the outer part (the mark on the rod is the outer part of the pipe). Most likely, you will not be able to get into the grooves from the first time, but this is not a reason for frustration, make a few more attempts and you will definitely get.
Note. As an auxiliary rod you can use the same PND pipe with a compression fitting - fasten the fitting to the attachment point (black bowl), and then attach the pipe to it. Only the HDPE must be fixed tightly, and screw the fitting to the adapter not to the end so that it is easier to remove after installation.
The cable that is attached to the pump for fixation is screwed to the top of the head, so that the pump rests on it, and not on the adapter or electrical cable. The electric cable can be attached to the terminals on the top, but you can simply release it into the trench, bypassing these terminals - you still have to increase it, since it will not be enough to the building.
Water supply to the house
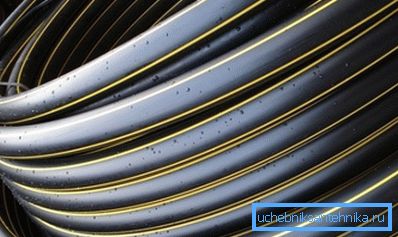
We screw on the adapter a compression polyethylene sleeve for the pipes and fasten the HDPE pipe to the other end of it, which we deploy along the trench all the way to the house, just need to make a reserve for input.
By this time we should have a trench with a sand cushion and a hole under or in the foundation tape, as well as a pit in the room. The caisson in the house is usually bricked up and then plastered, but sometimes concrete rings or even a wide plastic barrel are used for this purpose.
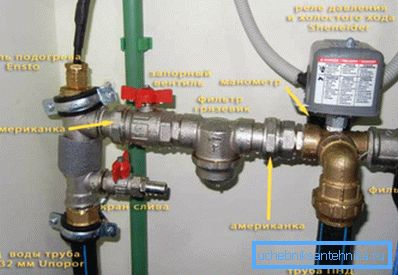
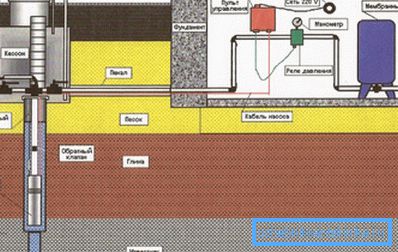
So, let's imagine a conditional situation that we have already brought a polyethylene pipe and an electrical cable into the caisson, which was equipped in the room (it is too early to fill the trench - this is done only after the tests). Now we are interested in the further water supply scheme at the dacha from the well, and immediately after the HDPE of the pipe we install the main valve (the heating cable does not count, it is optional), after which the coarse filter cuts.
The upper photo shows that further, according to the scheme, a block is connected with a pressure switch and a dry-running sensor, although the author of this article came to the conclusion that it is better to buy a sensor and a relay separately - this prolongs their operational life. In any case, only one device can fail, and not the entire unit.
The cable from the pump and the cord that goes to the outlet with 220V power supply are connected to the relay terminals, but you can not install the dry-running sensor, but it serves to automatically turn off the pump if it does not pump water, that is, it runs dry .
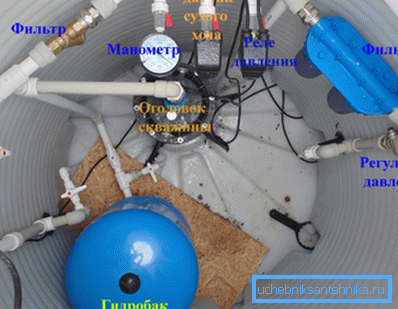
A membrane tank can be embedded anywhere, that is, before the relay or after it, it does not matter, since in any case pressure will be created in the tank itself and in the pipe section from the check valve to the water distribution stop valve. The larger this tank, the less frequently the relay to start and stop the pump will operate, as the reserve pressure will increase, but this capacity should not be more than 100 liters.
In addition, the mode of starting and stopping the pump depends on the settings set on the pressure switch. In the factory version, the start is triggered at a pressure of 2 atmospheres, and a stop at 3 atmospheres. But you can expand this range by setting the start to 1.5 atmospheres, and stopping to 5 atmospheres. By increasing the gap, you reduce the number of starts and stops of the engine, which increases its operational life.
Conclusion
After the final assembly, the water supply system at the dacha needs to be tested and if everything works fine and there are no leaks anywhere, you need to fill the trench and seal the pipe entry point to the foundation with cement mortar or tile glue so that soil moisture does not get into the room. The pipe is first covered with sand to cover it by 5-8 cm, then it is poured over with water to shrink the sand and cast over with soil.