We lay water pipe from the well to the house
To equip the water supply system in a private house from a well with a submersible or surface pump is quite possible, if only you understand the wiring diagram of one or another electrical equipment. Currently, most residents of the private sector prefer submersible units, as more powerful and reliable.
Only here they can be different, therefore, you need to understand what you choose. We will tell about such devices, their connection method and pipe laying below, and also you will see a thematic demonstration of the video in this article.
Water pipes
Choosing a pump
Note. At the moment, we are interested only in those types of submersible (deep) pumps that are used for water intake from wells and boreholes. In addition to them, there are also fecal and drainage pumps, which are used both for cleaning toilets and for cleaning water reservoirs or the same wells. In addition, such units are divided according to the principle of operation - they are centrifugal and vibratory.
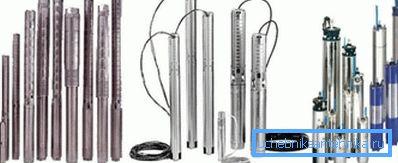
Currently, water intake from wells and boreholes can be performed using submersible pumps, and the level of the mirror from the surface does not matter (some models are able to pump water from a depth of 200-250m) - it is only important that the depth allows it. If we are interested in the laying of water supply from the well to the house, and not just watering the vegetable garden, then, of course, we should give preference to centrifugal units.
Only here it is important to correctly calculate the power of the device, so that it is enough for the maintenance of all sanitary units in the house - for such a selection, pay attention to the table below.
| Bathroom name | Water flow |
| Washbasin taps | 0.4m3/hour |
| Toilet bidet | 0.4m3/hour |
| Toilet | 0.4m3/hour |
| Sink taps | 0.7m3/hour |
| Dishwasher | 0.7m3/hour |
| Washing machine | 0.7m3/hour |
| Shower cabin | 0.7m3/hour |
| Hydrant for watering the garden (garden) | 0.7m3/hour |
| Bath | 1.1m3/hour |
Water consumption for an hour in different bathrooms
In order to determine the total maximum water consumption, you just have to look at the table above and add together the indicators of all your devices. The label of the pump, which is necessarily included in its technical passport (instruction manual) and often on the body of the unit itself, indicates its capacity and nominal capacity for water intake in m3/hour.
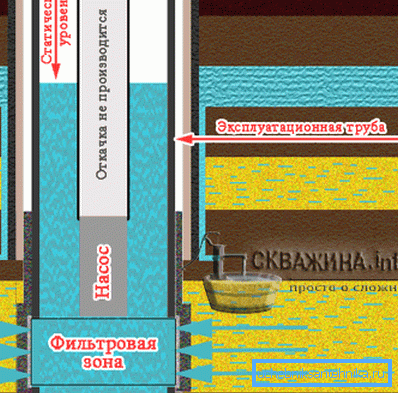
In addition to the power and principle of operation, the pumps are also chosen in diameter and length - if the diameter is not important for a well, then not any unit will creep into the well. But the length is needed so that a fully submerged device does not reach the bottom by at least 30-50 cm, but the water level may vary depending on the time of year or the intensity of water intake.
There are two levels of water - static and dynamic, from which you should make a start to determine the length of the submersible pump. The static level is the indicator when the water intake was not made during the day, but mostly repelled from the dynamic level.
To determine the debit of a well or a well, water is pumped out of the water for an hour and that mark, on which the mirror will turn out after this time, will be called a dynamic level. The smaller the difference between the two indicators (dynamic and static), the better the ability to replenish. The pump must sink 30 cm below the static level and at the same time not reach the bottom at the same distance.
Digging and other preparatory work
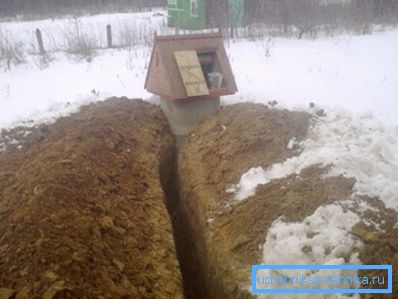
- Let's start with the technical parameters - the water supply system from the well to the house is being laid along a trench, the depth of which should be at least 50 cm deeper than the freezing point of the soil in your area. In addition, this figure also includes a sand cushion at the bottom of the trench, the thickness of which should be at least 2 cm - this is necessary so that the polyethylene hose does not get damaged on the stones, and uniform pressure is applied to it from above.
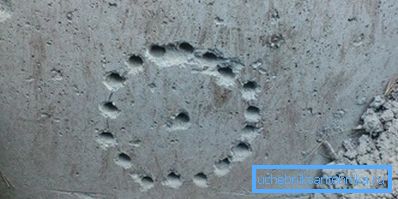
- Now, regarding the hole that you will need to make in the concrete wall of the well ring - it cannot be made a victor or diamond cutter, since the wall is reinforced with steel wire, and sometimes even with reinforcement. Therefore, you need to draw a circle of the desired diameter, so that you can push in a compression corner fitting for a 32 mm polyethylene hose. Drill a delineated circle around the perimeter, as shown in the photo above and knock out the middle with a hammer or perforator.
- By the same principle, you can make a hole in the foundation, although there it will be somewhat more difficult - after all, such a tape is usually at least 40 cm thick, so it is better to beat the hole from two sides - from the street and from the room.
- In order for you to have the opportunity to punch a hole in the foundation, you need to dig a pit from the street and indoors. Its size should correspond to your dimensions and the length of the tool, that is, you should have the opportunity to work there with a shovel and punch with a long drill.
- In addition, before you lay the plumbing, you need to equip a place for the pumping station and best of all if you use the same pit for this purpose. You will only need to lay out the brickwork inside and plaster it, you can also use a wide well ring. However, nothing will prevent you from equipping such a unit at the top, without using a pit, but this will take a certain place in the room.
Installation
Note. It is best to use a polyethylene hose with a diameter of 32 mm as the water pipe leading from the pump itself to the water distribution unit. It is labeled as HDPE - low pressure polyethylene.
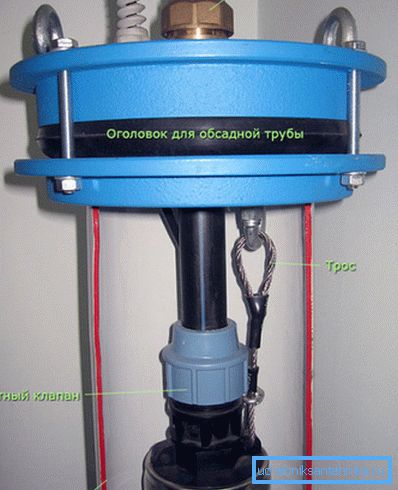
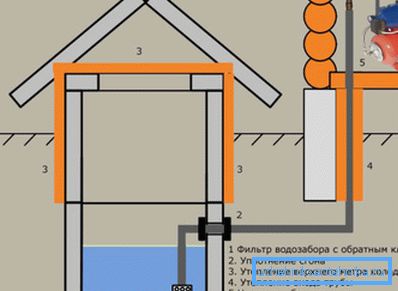
Look at the top photo - there you see the connection of the submersible pump in the well, but it also connects in the well, only there is no end there, but let's order. A check valve is screwed on top of the pump itself, which prevents water from flowing down into the well or well, and the pump is attached to the well ring with a cable that is supplied.
For fixing at the top (within reach from the surface), a hole is drilled in the ring and a cable is inserted there, which, after stretching, is fixed either with a bolt clip, or simply wound onto a piece of reinforcement (for wells, this is done on the tip).
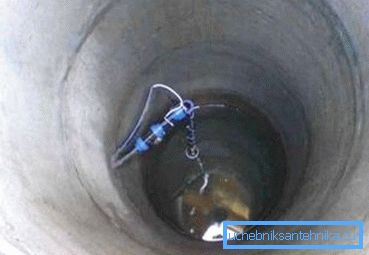
If you have a well, then you wind the PND (using a compression fitting) on the non-return valve so that this segment is enough from the recessed pump to the through hole in the well ring. There, this hose must be connected to another section leading from the well to the water-separation node, and this is done using an angle compression fitting.
Lay the fitting itself in such a way that the load from the edges of the hole made in the ring falls on it; pull the electrical cable that goes from the pump through the same hole.
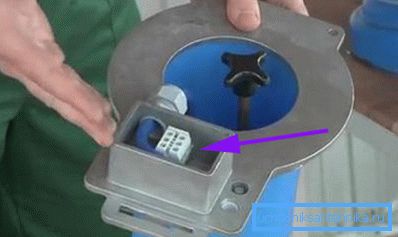
If you are working with a well, then there are special terminals on the top with which you can connect two pieces of cable - from the house and from the pump.
If you work with a well, then you will have to make such a connection directly into the trench, since the cable from the kit will not be enough for you anyway. Twists are best insulated with thermo nozzles, especially since their price is cheap, less than the cost of electrical tape.
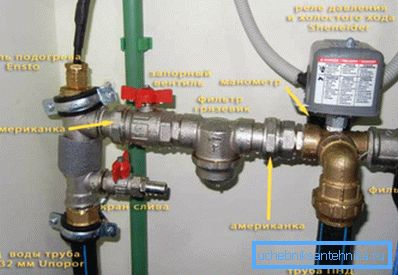
Now let's move on to the connection, more precisely, to the assembly of the pumping station and to do this, look at the top photo - you can see how the first stage of the connection is made.
Let's go, we will lower the heating cable (it is not interesting to us now) and follow the nodes - from the HDPE, which comes from the pump, the main valve crashes, then the coarse filter and it all goes to the pressure relay unit and the dry-running sensor. It is noteworthy that if the sensor and the relay are in the same block, then they are less reliable, so it is better to purchase these nodes separately.
The pressure switch is directly connected to the outlet (of the same PND) to the membrane tank, which is usually at least 70 liters. After that, another filter is installed, but already finely cleaned (usually, this is a model with a replaceable cartridge), and from there the wiring to all sanitary units in the house begins.
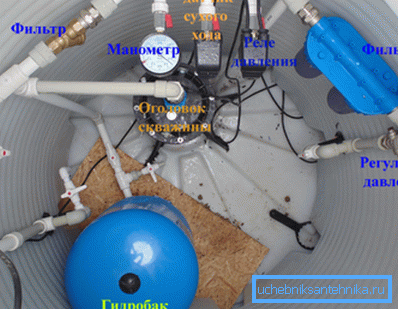
If you want to optimize the operation of the submersible pump, that is, to reduce the gaps between the start and stop cycles, then you will need to change the factory settings for the pressure switch.
So, the automatic stop of the centrifugal engine by default on the pump occurs when the pressure in the membrane tank 3 of the atmosphere is reached, and it is started when it drops to 2 atmospheres. You can change these parameters by setting 5 atmospheres to a shutdown, and 1.5 atmospheres per start, but be careful not to damage the device itself.
In addition, the scheme of the water supply in a private house from the well should be guided by the factory instruction of the pump. Of course, the principle of connection is the same everywhere and it is described above, but there may be some nuances.
Conclusion
In conclusion, it should be noted that the operational life of a submersible pump depends largely on the purity of the source from which the water intake is made, since such units are not designed for pumping sand and silt. Therefore, at least once every 3-5 years, you need to clean the well or well with your own hands.