Well for well: self-development
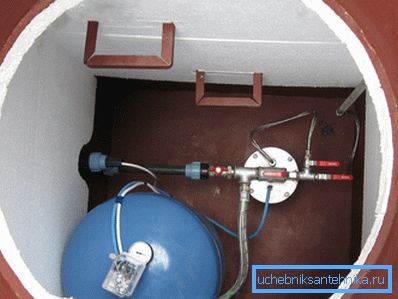
Equipping an aquifer well with your own hands, it is necessary not only to mount the pump correctly, but also to install the top trim. The harness, which is sometimes called the well bore, is a special-shaped body, inside of which there is a well head and stop valves.
The installation of the well makes it possible to place the upper part of the well below the ground level, thereby protecting it from freezing and mechanical damage.
Varieties of wells
Pit
Depending on the available resources and tasks, you can equip several types of wells.
And the simplest from the point of view of installation is the pit:
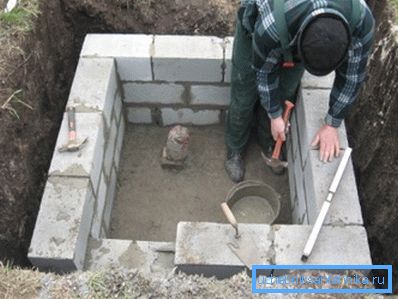
- A well of this type is a recess dug around the wellhead, in which stop valves are placed.
- The pit is usually made with a depth of at least one and a half meters, while the walls are lined with brick or poured with concrete.
Tip! If the soil in your climate zone freezes through quite deeply, it is worth warming the well pit.
- The upper part of the pit may overlap, but this does not provide sufficient tightness.
The main advantage of the pit is that it can be made by hand using the materials at hand. At the same time, a high level of humidity inside such a well does not allow for the placement of automatic regulating units, hydraulic accumulators, etc.
Adapter
Unlike the pit, the adapter is a structure that is installed on the well casing itself:
- As a rule, an adapter device for a well is made of steel or plastic. The steel version is preferable because it provides greater tightness.
- The adapter is mounted in such a way that the water pipe is below the ground level.
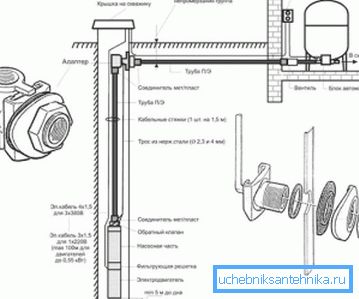
The main advantage of this solution is low price. However, it can only be used if one casing is used for water intake.
It should also be noted that to equip a well with an adapter is possible only if the well pump is fixed on the pipe. Suspended systems are equipped differently.
Caisson
The most perfect type of strapping is a caisson well:
- The caisson is a sealed container, inside which is located the tip of the well, water pipes, automation and stop valves.
- By construction, the capacity is somewhat similar to the pit, however, it is much more waterproof, and also has high heat-saving characteristics.
- Caissons can be purchased in specialized stores or make yourself. In the second case, you will save a lot, since plastic and metal containers are quite expensive.
It is on the caisson construction of the well, and we will stop as the main option for tying our well.
Caisson Manufacturing Technology
Materials
Today, caisson-type devices are made from a variety of materials:
- Plastic - the most affordable price of those that are on sale. Differ in high tightness and sufficient durability. At the same time, the plastic walls conduct well heat, because the caissons made of PVC must be warmed.
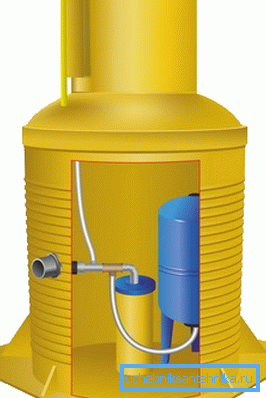
Tip! To prevent deformation of the caisson capacity, experts recommend mounting it not on the ground, but on a concrete pad with a thickness of 5 cm.
- Metal - made from steel with anti-corrosion coating. Characterized by high mechanical strength and water resistance. Like plastic, require compulsory insulation. The main disadvantage is the high price.
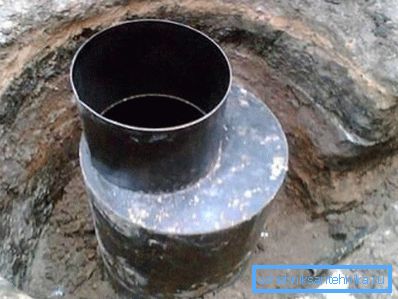
- To ensure the tightness of all connections, it is recommended to weld the lower part of the caisson to the casing, if possible. To prevent moisture from falling on the walls of the caisson, concrete paving can be made around the perimeter.
- Concrete - made by yourself. At observance of technology of installation they are not inferior in tightness to steel and plastic wells of factory production.
Below we describe how you can make a caisson well of concrete.
Preparation of the pit
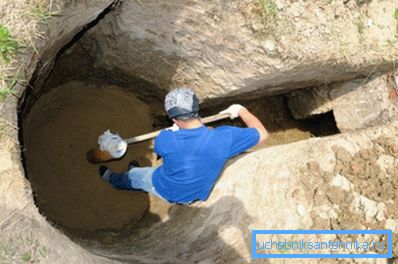
At the first stage of work around the well with the installed casing we dig a pit:
- In order not to damage the well and tip, we use only hand tools.
- The minimum size of the well is 1x1x1m, maximum 01.5x1.5m with a depth of 1.8 - 2m.
- The pit itself should be done somewhat more, since part of the volume will be “eaten” by walls, flooring and insulation around the perimeter.
- We pour 20 cm of gravel-sand mixture on the bottom of the excavated pit. The mixture is moistened and rammed until it ceases to decrease in volume.
After that, you can proceed to the formation of walls.
Walls of the caisson well
The instructions for the construction of walls provides for the work according to this algorithm:
- At first, all surfaces are covered with dense polyethylene. This will create an additional waterproofing circuit and protect the equipment located in the caisson from moisture.
- We retreat from the grid about 5 cm and install the rebar. The reinforcement of the well is a grating with a mesh size of about 200-250 mm.
- We knit or fix the armature from a bar with a minimum thickness of 5 mm.
- Then we assemble formwork from the boards and boards. Since the walls will be quite thick, we provide space for the installation of struts - they will protect our structure from being squeezed out by a mass of concrete.
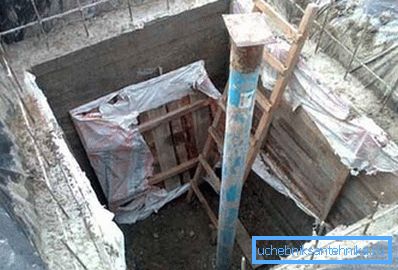
Tip! If the height of the caisson well exceeds 1.5 m, then the formwork should be mounted in two steps, filling one circuit after another.
- To eliminate the flow of the solution, we sheathe the formwork with polyethylene from the inside, fixing it on the bars and planks with a construction stapler.
- Fill the concrete in the formwork, treat it with a vibrating compactor and leave to dry. Full drying takes about four weeks, but on the 10th day board boards can be dismantled.
- After complete drying of the walls with a perforator, we make holes in them at the places where the pipes pass.
Tip! To prevent the pipes from being damaged, we run them through the wall in special metal sleeves. The gap between the sleeve and the edge of the hole in the wall is sealed with self-expanding mounting foam.
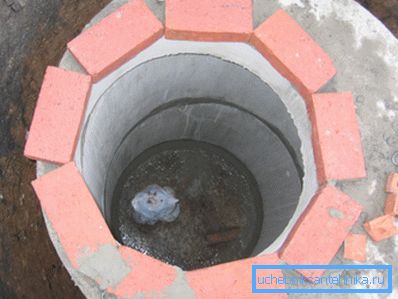
As an alternative to concrete walls, brick masonry or annular reinforced concrete pipes can be used. Naturally, in this case it is necessary to pay close attention to sealing the seams.
Mount the overlap
Very important is the correct installation of the ceiling:
- On the upper part of the walls we install a monolithic reinforced belt. In it we lay the reinforcing mesh with a cell of no more than 150 cm, after which we pour concrete into the formwork with a height of up to 150 mm.
- We lay boards from 30 mm thick on a monolithic reinforced contour. We make the laying with a minimum clearance, not forgetting to leave room for the hatch arrangement.
- For high-quality waterproofing we cover the boards with polyethylene, fixing it with metal clips.
- Along the perimeter of the well and along the edge of the hatch we make formwork.
- Fill concrete in the formwork, level it and leave to dry.
Tip! To the surface to lose water slowly, and the cement managed to gain maximum strength, it is necessary to cover the well cover with plastic wrap. Periodically, the film needs to be raised and moistened the concrete floor.
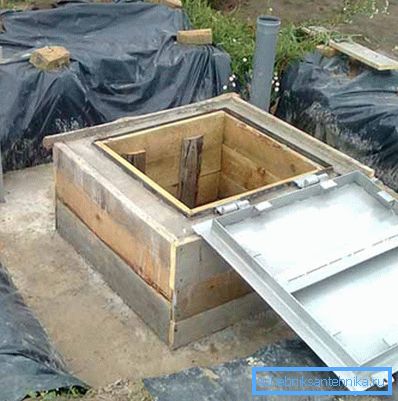
When the fill is dry, in the pre-left hole install the hatch. Along the perimeter we fasten it with a steel corner, and hang the lid on reliable hinges. To ensure high-quality thermal insulation from the inside, the cover should be insulated with foam or polystyrene foam.
Features of the installation of factory products
If we bought a ready well - steel or plastic - then our task is facilitated many times.
And yet it is very important to properly install the purchased device so that it provides reliable protection for all equipment servicing the well:
- As is the case with the concrete structure, we are preparing a pit. Its dimensions must be at least 300 mm larger than the body of the caisson.
- At the bottom of the pit we are equipping a gravel-sand pillow. If the product is plastic, then on top of the cushion we pour a concrete tie with a thickness of at least 50 mm.
- In the bottom of the structure we make a hole for the installation of the casing.
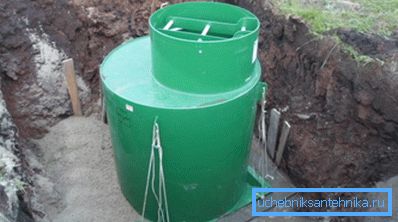
- Install the body in the pit so that its neck was 10 cm above the ground level. So we will protect the well from getting into surface runoff.
- Qualitatively seal the connection of the well and casing. To do this, you can use special sleeves that are welded to the bottom of the well.
- Align the caisson in the pit with the help of uneven bars. We sprinkle it around the perimeter with clay, which is then rammed, providing effective waterproofing.
Tip! In some cases, sprinkling with expanded clay is needed to reduce heat loss.
- In the technological holes of the walls we start pipes and cables in the enclosures. We perform sealing of all connections.
- Finally we fall asleep the ground pit.
- We mount the cover of the well.
Along the perimeter, you can pour a narrow concrete belt. It will also protect the walls from moisture ingress, which will significantly extend the service life of the whole structure.
Conclusion
We hope that our advice on how to make a well well, will be useful and will be applied. It is not worth saving on the strapping: since we have already spent on the well, then it is worth making a little more effort so that it works without interruption. The video in this article contains additional information that will be useful for everyone to learn the technology of well construction more thoroughly.