Well on the site - the nail of the whole program of
There is always the question of how much it costs to make a well on the site. What can you do, but water and light are the two most important factors determining our life, and not only in the suburban area.
And it is great if it is possible to bring a branch from an existing water supply system to your home without great expenses. And if you are unlucky with this, you will have to look for water nearby under the ground and drill wells.

Without water, not a day
Water, as a rule, is. You only need to skillfully search and decide how it will rise to the surface. If there is sufficient pressure from below, then it is best to stop at the artesian well, if there is no pressure, the well will help, which happens more often..
The cost will consist of the following works:
- The search for water - more precisely, the search for several points of test drilling. Of course, you can invite specialists to do this work, but we advise you to save money and try to conduct a search yourself, this is not difficult at all, especially since the next step will be decisive.
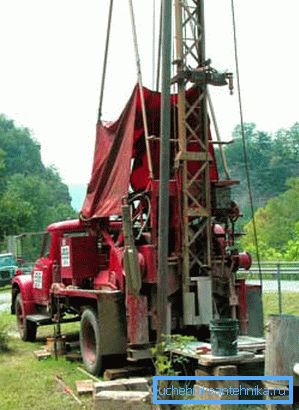
- Conduct test drilling - be sure to choose several points in different parts of the site. This work is already being done on the order of "drilling affairs by craftsmen" and special equipment.
- Exact study of the final location of the well and the creation of a plan for its construction.
- Creating a well - from digging a mine to the equipment of a cap and a clay castle;
- Pumping the well and analysis of the produced water;
- Connecting the well to the water supply system, if provided.
Search
It can be said with a high probability that your site is not on the rocks, then there is water, you just need to find it, and for this, make a map of its intended location, taking as a basis the parameters of your site.
The initial data for this card will be:
- first of all, a careful study of the location and condition of the wells at the neighbors; be sure to hold such consultations, often they will be the main decision-making engine;
- if there are no already existing wells nearby, then you can solve the problem of how to find water in the area under the well:
- on the behavior of the frame of the vine - it should bend in the place where the underground moisture content is high;
- on the behavior of the electrode frame - this will behave very restlessly if there is water under it;
- by the behavior of their animals - when they are thirsty, they lick the ground in places where there is more water under the ground;
- if you notice a place where your cat lays down to rest, and the dog is avoiding this place, then perhaps water vapor comes from below;
- according to where the fog accumulates at sunset;
- according to where the oak, juniper, hazelnut, and beech choose for themselves a place to grow, they like moist soil very much; in this connection, pay special attention to lonely standing oaks - in that place, according to centuries of experience, there is almost certainly water;
- exploring bags of silica gel pre-hidden in the ground; if after a day the granules are wet, there is water at the bottom.
Helpful advice! The use of silica gel or any other chemical substance with very high absorption gives good results when searching for water. But we must bear in mind that working with it requires the protection of the respiratory tract, this substance is explosive and the fire is not safe. In addition, it perfectly reacts not only to water, but also to petroleum products, ether, which can be misleading.
Test drilling
When the map of the possible horizontal location of the water layers is drawn up, it is necessary to select points for test drilling.
There are some limitations:
- this point should be located 20 meters from the main residential building of the site to eliminate the influence of the house soils;
- the distance to the nearest edge of the carriageway must be more than 7 meters;
- to the neighboring section - at least 5 meters (otherwise, you will have to get the consent of your neighbor);
- no closer than 30 meters from agricultural fields;
- no closer than 15 meters from the outbuildings, not to mention the silage pit.
Test drilling should determine:
- the depth of the water reservoir;
Helpful advice! With all possible options, we advise you to choose wells with a depth of no more than 20 meters - in this situation, no permits for the well are required, otherwise you cannot do without a pile of papers. In addition, keep in mind that if the pressure from the well is large enough, and you decide to stop at this option and not “fence” the well, then in any case you will have to register the well and create its passport.
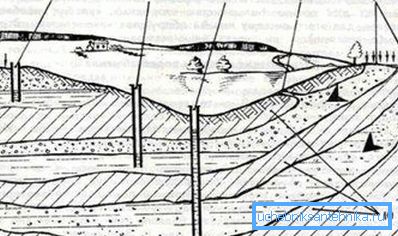
- the nature of the soil on the approach to the reservoir - the upper support and the nature of the soil from the bottom - the lower support; you will have to face one of the four situations of placement of water layers, shown in Figure "A":
- the depth of up to 4 meters - the topmost and most polluted layer - upper water pipe;
- 5 - up to 10 meters - upper ground free-flowing water;
- 6 - up to 40 meters - interstitial waters;
- 7 - from 10 to 250 meters - artesian water under pressure, the cleanest; depth in different areas is very different;
in addition, the figure indicates:
- 1 - layer of artesian well;
- 2 - interlayer layer;
- 3 - a layer of upper groundwater;
- 4 - the main power source - rain and melt water;
- 8 - upper ground, often sandstone;
- 9 - artesian water has its exit to the surface below the point of drilling, which actually provides upward pressure in the well;
- 10 - lower interlayer soils.
The progress of the main work
So, the question of how to find water on the site for the well, was successfully solved, you decided on the point of digging the well. You can proceed, but first you need to decide on the material under the shaft of the well.
Material
From available materials with us:
- wood - profiled timber or round logs - a good choice if the wood is carefully prepared for future conditions of use;
- reinforced concrete rings - most often at present used structures;
- plastic rings - as a lighter alternative to reinforced concrete;
- stone is a good option if the stone has sufficient strength and you are ready for big works with concreting;
- brick - often used material, but always waterproof.
Helpful advice! We advise you to pay attention to plastic. In terms of its strength and durability, it will not yield to reinforced concrete, but it is much easier, which can be a significant factor, given the work at depth.
Go down
Digging technology will be quite simple - you will need to dig a vertical shaft
- to the upper edge of the lower supporting formation, thus creating a perfect well;
- or stop digging within its water layer, in order to confine itself to the so-called imperfect type of well.
Further, we proceed as follows:
- create a temporary barrier to the water below and pump out the water to access the bottom; this operation is often very difficult to carry out, therefore, they are simply limited to punching a well 1.5–2 meters below the water level;
- in this regard, we advise you to opt for the use of reinforced concrete rings, which will help to create a reliable barrier to water entry below;
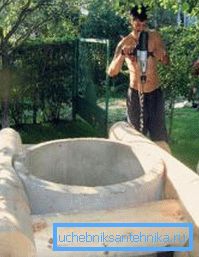
- Gradually make out the mine selected material to the ground level at the top; do not forget to carefully concrete all the joints, it is necessary to completely eliminate the possibility of moisture penetration into the well through the mine shaft;
- if the well is supposed to be included in the general water supply system of the house, then it makes a drainage system and is obligatory at a depth below the ground freezing level.
Works below
For the "healthy" functioning of the well, be sure to take care of the following design of its bottom:
- A - place a layer of fine sand below;
- B - coarse sand will go to it already;
- C - put a layer of well-absorbing material here, the mineral called shungit, used in wells for a long time, is best suited;
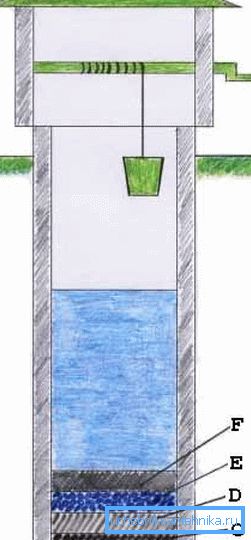
- D - coal layer - anthracite of medium size;
- E - quartz crumb layer;
- F - silicon gravel.
Works at the top
When the last ring came to the surface, you will need:
- carefully concreted joint of the surface of the ring and the ground (A);
- create a clay castle along the entire perimeter of the well, at least one and a half meters in size (B), gradually descending from the well (C);
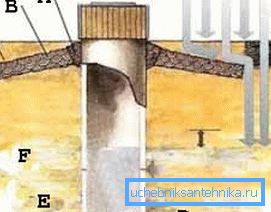
- to protect the opening of the well, for a start with an airtight lid, and then, perhaps, having built a house with a window and a door.
In the figure "B" also introduced the notation:
- D - bottom of the well;
- E - aquifer;
- F - upper supporting layer;
- G - rainwater - well, you can trace the purpose of the castle; he diverts outside water away from the well shaft.
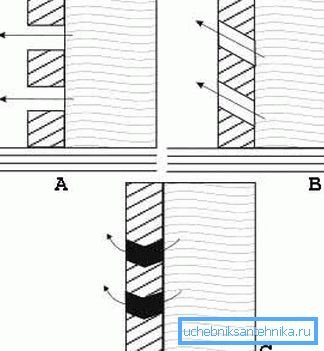
Helpful advice! We advise to equip the body of the well with cement moisture-transmitting filter inserts: straight (A), at an angle upward towards the well (B) or conical (C). The idea is that such inserts will not allow moisture to accumulate outside, it is allowed to penetrate inside, but through strictly defined places where such filters are located.
Pumping and maintenance
With the completion of the tip, the work on the well does not end:
- First, it will need to be pumped to obtain pure water, and then,
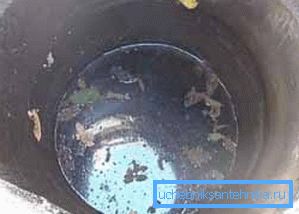
- Secondly, to constantly engage in its maintenance:
- removing leaves;
- cleaning the inside of the mine from the raid;
- periodic assessment of water quality.
If you chose the option of including a well in the general water supply system at home, then the work will continue outside the well.
You will need to create something like the following:
- A - a distance of 15 cm - the minimum at which you can have a horizontally oriented pump;
- B - then you have to make the connection with a flexible hose;
- C - check valve;
- D - pipeline;
- E - if the pump is located vertically, which is strongly recommended, then the distance should be at least 50 cm;
- F - unloading valve with tee;
- G - plates of the insulation system;
- H - power socket of the pump control system;
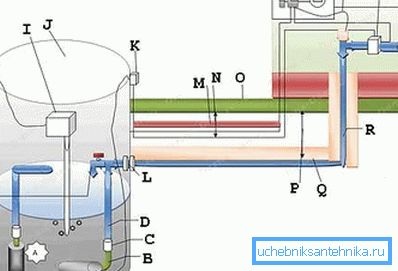
- I - compressor - a feature of this scheme, the function of enriching water with oxygen can significantly improve the quality of water;
- J - well - with this use, often the tip is even missing and simply solves the problem of how to disguise the well against the background of the surrounding grass;
- K - socket again;
- L - outlet pipe connector, the requirements for the quality of this compound are the highest, especially if you built a well in the peat area;
- M - electrical cable protection;
- O - cable at a depth of 60-80 cm;
- P is the depth of soil freezing;
- Q - again a layer of insulation;
- R - pipeline (recommended diameter - 32 mm);
- S - protective grounding of the entire system;
- T and V - automatic overload protection plugs at 5 and 25 A;
- U - heating cable;
- W - differential pressure control switch.
findings
Having built one well, settled down with it and carefully examined the environment, with time, you may want to have two wells in the area. This, please. Remember only about respect for the soil and that the water under the ground is not unlimited.
The cost of errors caused by non-observance of technology or inappropriate courage will be quite high - right up to the water drift to the lower soils, when all your work goes down the drain. Be careful, do not forget to constantly engage in caring for the well.
Create your discipline of maintenance of this facility and strictly follow it. Really nothing to forget and develop your line of conduct will help you additional video in this article, which contains a lot of very useful recommendations.